
Bulk edit Shopify barcodes by type: UPC, EAN, GTIN, ISBN, ASIN and NS-PID
 Spreadsheet EditorExport: Excel & CSV Updated November 18, 2026
On this page
Since September 2026, every Shopify variant can hold up to 20 barcodes, and each barcode can have a type, such as UPC, EAN, GTIN, ISBN, ASIN or NS-PID. That’s great for stores that sell the same item under several codes, but it also means thousands of barcodes to fill in, check, and label with the right type.
With Mixtable Spreadsheet Editor you get one spreadsheet column for each barcode type. You can paste a supplier’s EANs, give your old untyped barcodes the right type, or add NS-PIDs for shipments to the EU across your whole catalog, review every change, then sync it to Shopify in one go. You can also export every barcode, one column per type, to Excel or CSV.
What changed in Shopify barcodes
Shopify announced multiple barcodes per variant on September 8, 2026. Here’s what that means for your store:
- Up to 20 barcodes per variant. Codes from different suppliers, regions, or marketplaces can all point to the same item. Shopify POS finds the variant when you scan any of them
- Each barcode can have a type. When you choose a type, Shopify checks that the value fits that standard. A barcode with no type is called Custom in your Shopify admin and can hold any code
- Your existing barcodes stayed where they were, with no type. Shopify didn’t migrate them, so most stores now have a catalog full of Custom barcodes
- Sales channels read the first barcode. Shopify’s changelog says channels keep using a variant’s first barcode, so the order of a variant’s barcodes matters
- The same code can’t appear twice on one variant. Each barcode on a variant must be different
The barcode types Shopify supports
| Type | What it’s for | What Shopify accepts |
|---|---|---|
| Custom (no type) | Internal codes and barcodes that follow no product standard, such as Code 128 labels | Any value up to 255 characters |
| UPC | The retail barcode used mainly in the US and Canada | 8 or 12 digits |
| EAN | The retail barcode used mainly outside North America | 8 or 13 digits |
| GTIN | A product number registered with GS1, the organization behind UPC and EAN codes | 8, 12, 13, or 14 digits |
| ISBN | Books | 10 or 13 characters, which can include the letter X |
| ASIN | The number Amazon gives each product in its catalog | 10 letters or digits |
| NS-PID | A manufacturer’s own product code, such as a model or part number. Shopify uses it on customs declarations for shipments to the European Union | Any value up to 255 characters |
The lengths come from Shopify’s barcode guide. Shopify also checks the check digit, the last digit that’s calculated from the others. For example, a UPC with a mistyped digit is refused.
Why barcode types are hard to bulk edit in Shopify
Shopify gives you three ways to work with barcodes, and each one gets slow once you have more than a handful of variants:
- The product page. Open a product, select its variants, and choose Edit barcodes. You can pick a type for each barcode, but only for one product at a time
- The bulk editor. Shopify says you can update barcodes for many variants at once here. Its documentation doesn’t say you can set barcode types, and as of October 2026 there was no bulk way to change types in the admin
- The product CSV. Shopify’s product CSV does support types, but all of a variant’s barcodes share one Barcodes cell, written like
gtin:00012345678905; upc:012345678905; INTERNAL-123. To change one type you edit that text on every row without breaking a prefix or semicolon, and a backslash, semicolon, or colon inside a code needs a backslash in front of it. A file can’t have both the old Barcode column and the new Barcodes column, so older import files fail until you update them
A spreadsheet with one column per type avoids all of this: each code sits in its own cell, under a header that says what it is.
How to bulk edit Shopify barcodes with a spreadsheet
Step 1: Create a spreadsheet with one row per variant
Barcodes belong to variants, so you need a worksheet with one row per variant. If you don’t have one yet:
-
Install Mixtable Spreadsheet Editor from the Shopify App Store
-
Open your Mixtable dashboard and click Create spreadsheet at the top of the page. If you haven't created a spreadsheet yet, click Browse all templates below the dashboard's suggestions instead. In the Create spreadsheet window, find Full product information under Products, or type its name in the search box, and click it to preview it. Then click Create spreadsheet at the bottom of the window. Mixtable creates the spreadsheet and fills it with data from your Shopify store.
The template creates a Products (with variants) worksheet with your products’ titles, SKUs, options, prices, and stock. Any other Products (with variants) worksheet you already have works too.
Step 2: Add a column for each barcode type
-
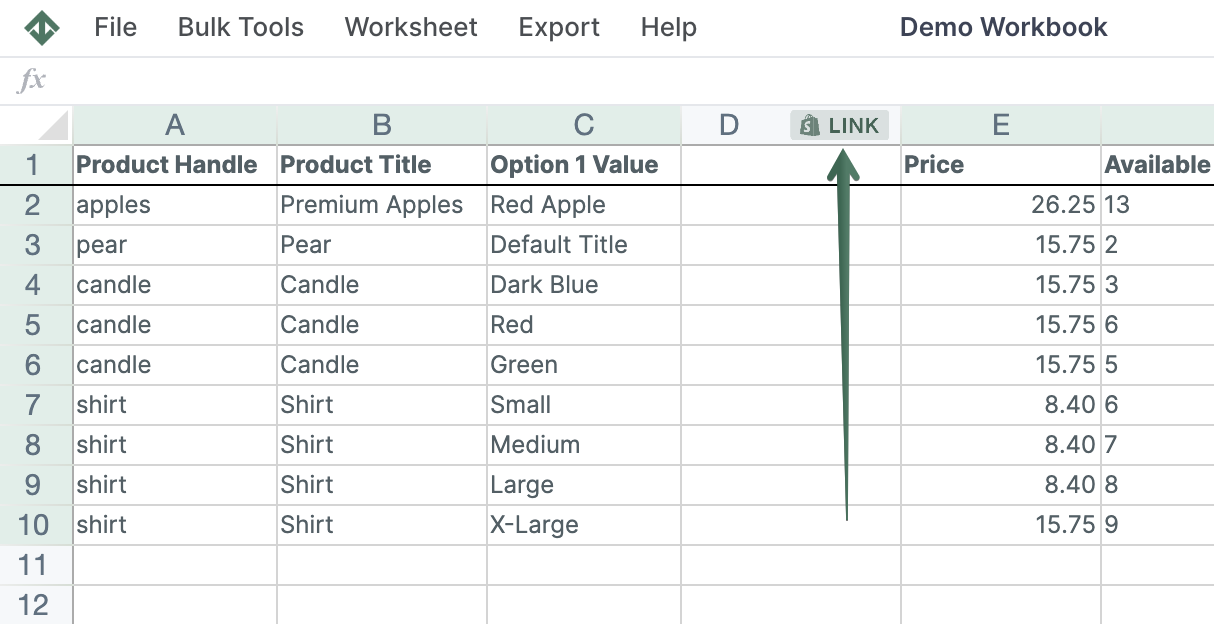
To load more Shopify data, click + Shopify data in the header row of an empty column, such as the one right after your last column. You can also choose Column > Add Shopify data… from the menu bar. The field picker opens and asks What should column E show?, with your column's letter in place of E. It lists everything the worksheet can show from Shopify, grouped into sections the way your Shopify admin groups them. Type in the search box at the top, or click a section on the left, to find the field you want.
-
Type barcode in the search box. You can also type the type’s name, such as UPC, EAN, GTIN, or ISBN, and typing MPN finds Barcode (NS-PID)
-
Click the field you want, such as Barcode (EAN), then click Save Column
-
Repeat for every type you work with
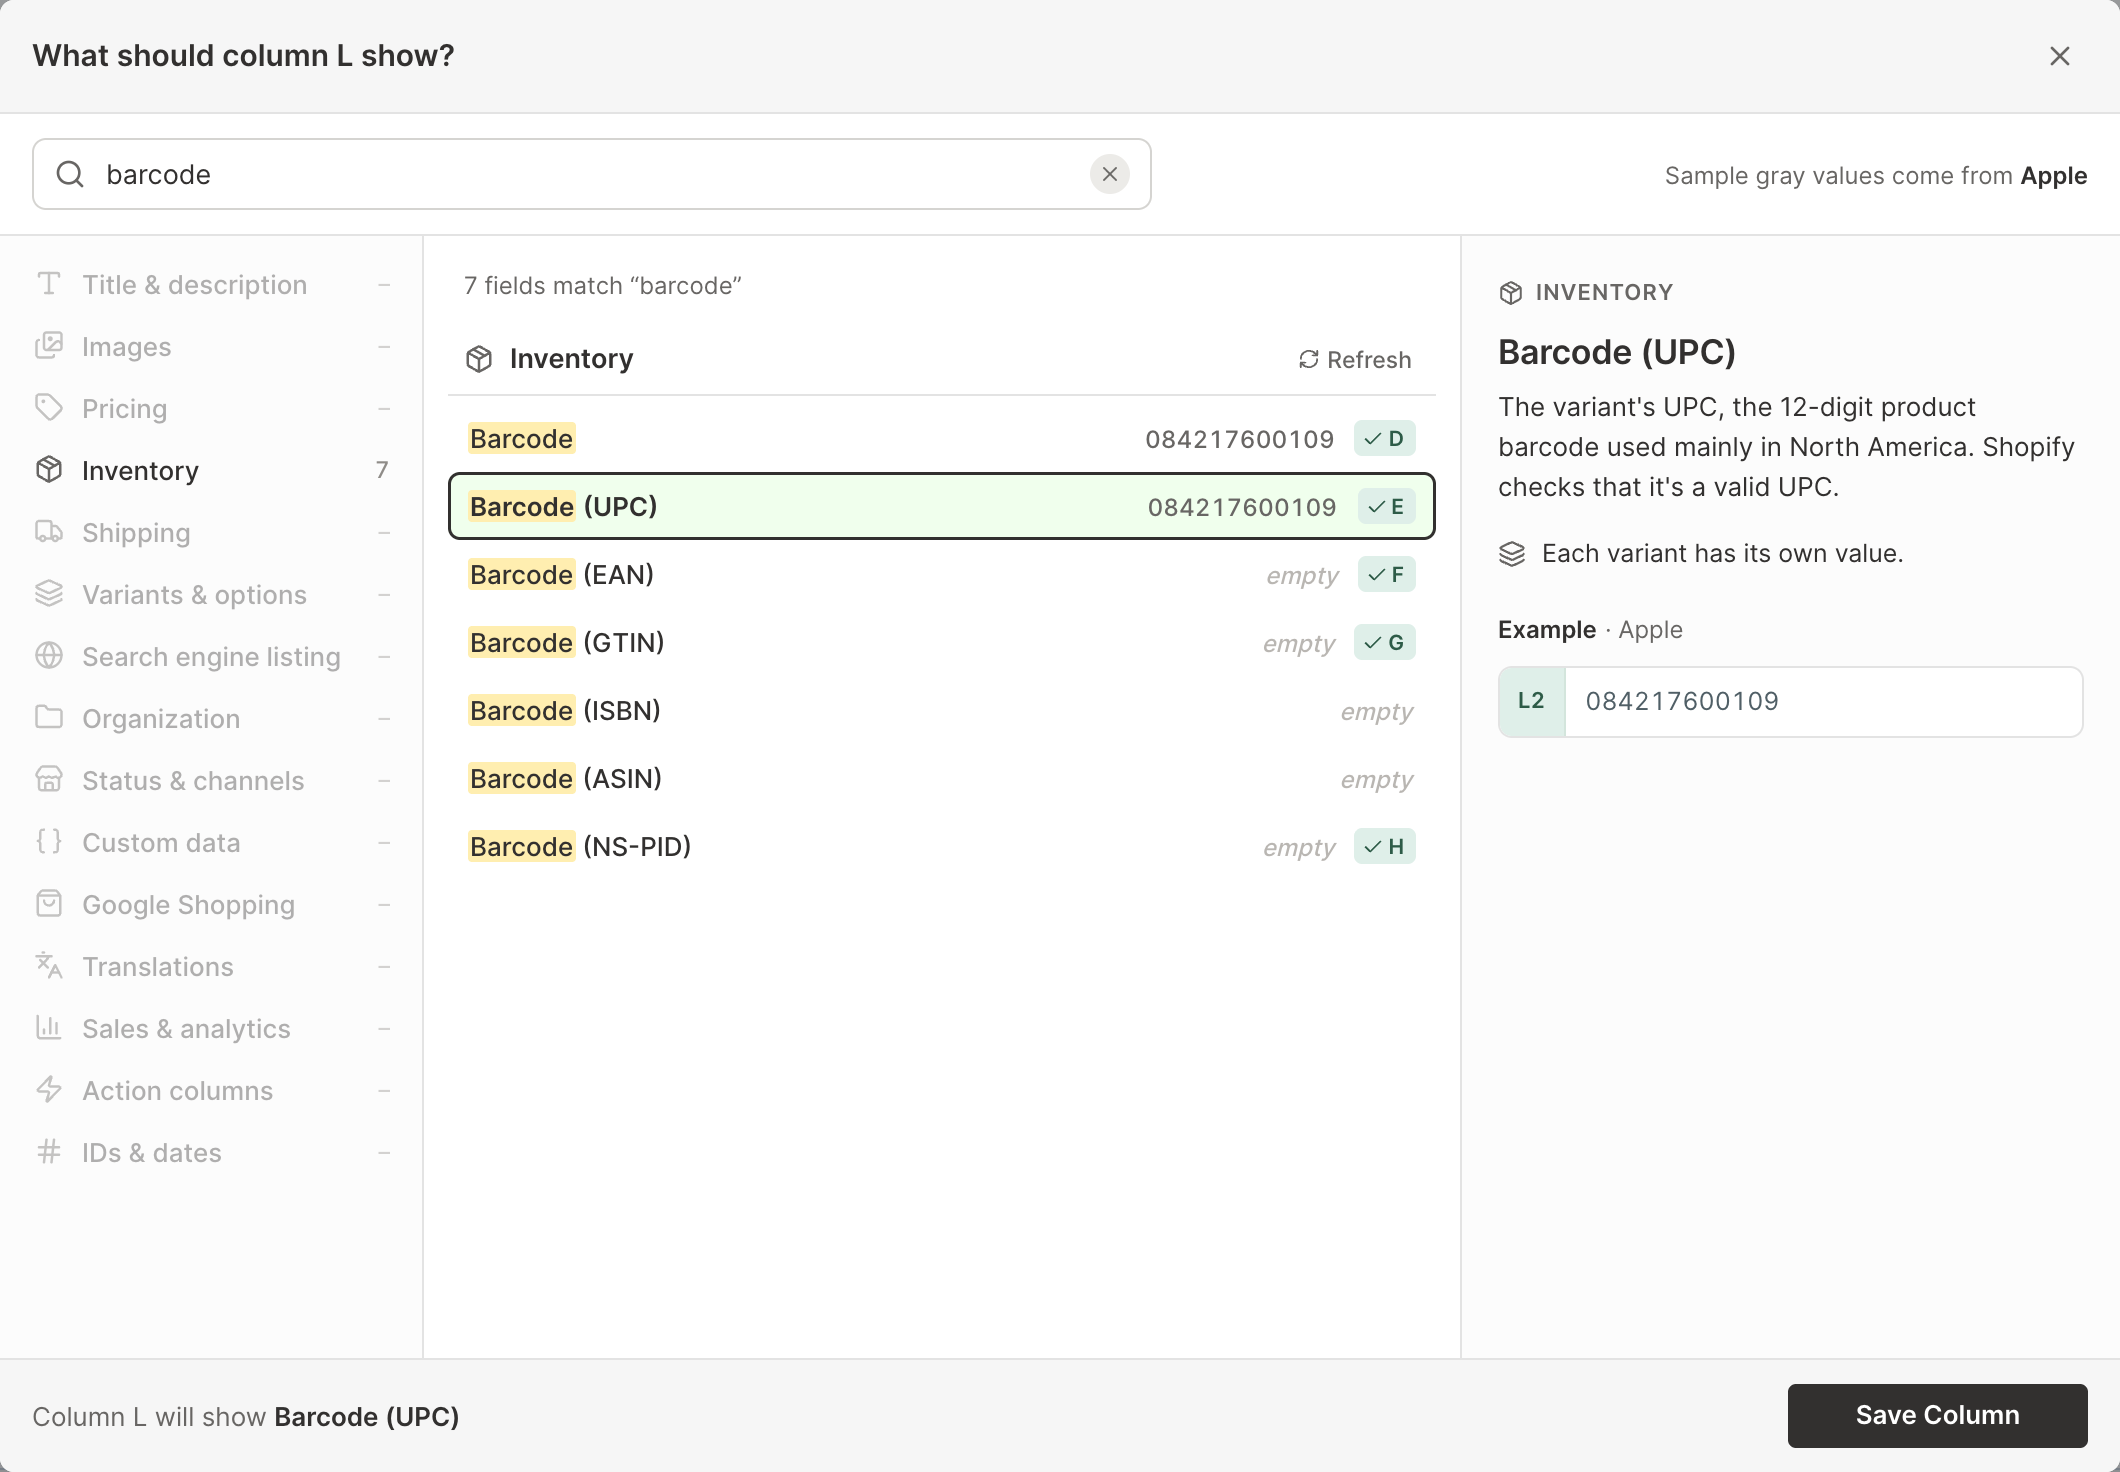
Here’s what each column shows:
- Barcode (UPC), Barcode (EAN), Barcode (GTIN), Barcode (ISBN), Barcode (ASIN), and Barcode (NS-PID) each show the variant’s first barcode of that type. The cell is empty when the variant has none
- Barcode shows the variant’s first barcode, whatever its type. That’s the code sales channels read, so it’s worth adding this column too
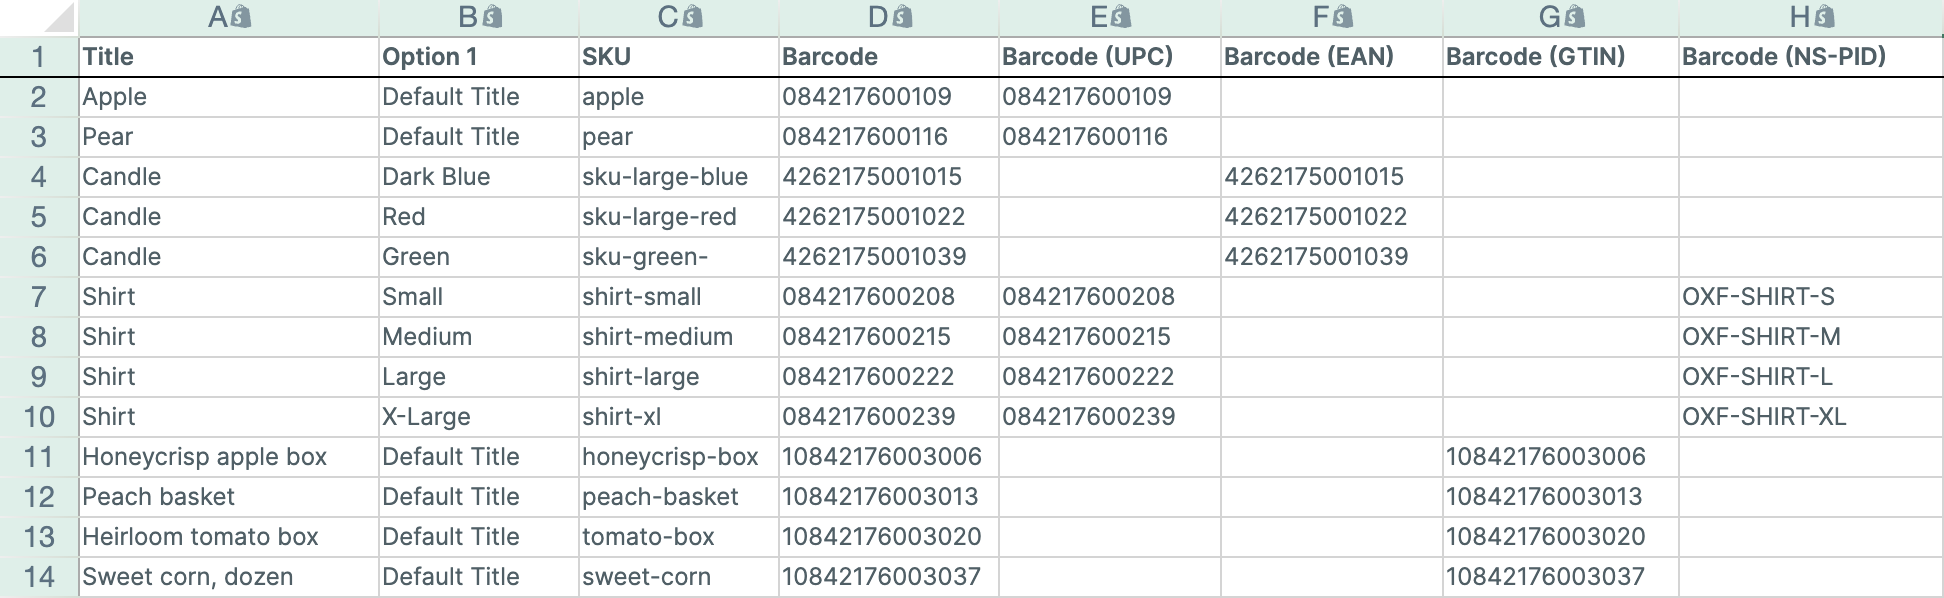
Barcode columns hold text, so leading zeros stay put. A UPC like 036000291452 never turns into 36000291452.
Step 3: Edit the barcodes
Edit the cells the way you would in Excel:
- Type or paste codes into a type’s column. A value in an empty cell adds a new barcode of that type to the variant
- Change a cell to replace that barcode. It keeps its type and its place in the variant’s list
- Clear a cell to remove that barcode from the variant
Every other barcode on the variant stays as it is. For example, editing Barcode (EAN) never touches the variant’s UPC or its untyped supplier code. Edited cells turn pale yellow until you sync them.
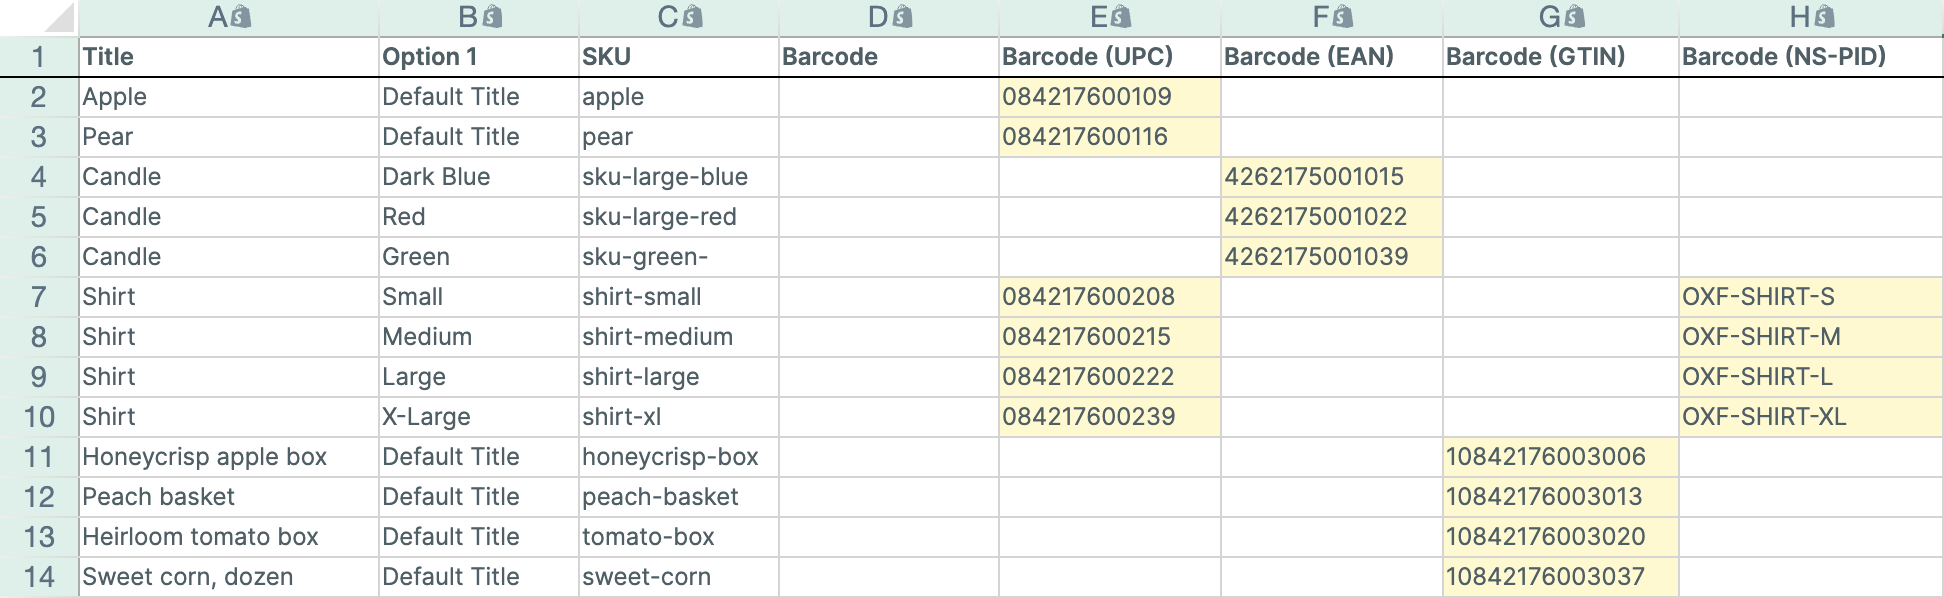
To work faster, paste a whole column from a supplier’s file, use find and replace to fix a prefix, or filter the worksheet to the variants you’re working on.
Step 4: Preview and sync to Shopify
When you are ready, look at the sync control at the top right of the spreadsheet, next to Share. It shows how many edits are waiting, for example 12 unsynced changes. Click Sync now to open the Preview changes window and review them, then click Sync in the window. To send them at a set time instead, click Schedule sync. Mixtable sends the updated barcode data to Shopify. It may take a few seconds for the changes to appear in your store.
Shopify checks every typed barcode as it saves it. If it refuses one, the sync control shows a sync error, and the error names the row and gives Shopify’s reason, for example “UPC barcode checksum validation failed for ‘123456789013’“. Nothing in that variant’s barcodes changes until Shopify accepts the row, so fix the value and sync again. Changes to your other products go through as usual.
Barcodes you change in Shopify flow back into these columns automatically, so your spreadsheet stays up to date. You’ll also see a variant’s barcodes by type in the Details panel, and every synced barcode change in cell and row history.
Common barcode jobs, step by step
Give your old barcodes the right type
Barcodes added before September 2026 have no type. When those codes are real UPCs, EANs, or GTINs, you can give them their type in one sync. This example makes them GTINs, and the same steps work for UPC, EAN, or ISBN:
- Add the Barcode and Barcode (GTIN) columns
- Filter the worksheet to the variants whose Barcode (GTIN) cell is empty and whose Barcode holds a real GTIN
- Select the Barcode cells, copy them (⌘C on a Mac, Ctrl+C on Windows), click the first Barcode (GTIN) cell, and paste (⌘V or Ctrl+V)
- Select the same Barcode cells again and press Delete to clear them
- Sync both columns together
Shopify then removes each untyped barcode and adds the same code as a GTIN. On a variant with only that one barcode, the GTIN becomes its first barcode, the one sales channels read.
Tip: Clear the Barcode cells before you sync. A variant can’t hold the same code twice, so Shopify refuses the GTIN copy while the untyped original is still there.
Tip: If Shopify refuses a code because it isn’t a valid GTIN, that row stays unsynced. Type the code back into its Barcode cell and clear its Barcode (GTIN) cell, and the variant keeps its untyped barcode.
Add NS-PIDs for shipments to the EU
Shopify uses NS-PID barcodes on customs declarations for shipments to the European Union. An NS-PID is usually the manufacturer’s model or part number, and Shopify staff have said it can be your own product code or SKU.
- Add the Barcode (NS-PID) column, plus SKU if you’ll copy from it
- Paste the codes from your supplier’s file, or copy the SKU cells into the Barcode (NS-PID) cells
- Sync
Keep one NS-PID per variant. Shopify staff advised it, because Shopify has no rule for which one to use when a variant has several.
Import barcodes from a supplier file
When a supplier sends a CSV of EANs or UPCs keyed by SKU, you don’t need to copy them row by row. With a SKU column and the barcode type’s column in your worksheet:
- In the menu bar, click Import & Export > Import CSV file, and upload the supplier’s file
- Match the CSV’s SKU column to your worksheet’s SKU column
- Let only the barcode column change, such as Barcode (EAN)
- Run the import, check the yellow cells, and sync
The Import CSV file guide covers every option in the importer.
Find variants that are missing a barcode
Google Merchant Center and other channels can limit products that have no GTIN. To list the variants without one, click Filter in the toolbar, click the ▼ button in the Barcode or Barcode (GTIN) header, click Uncheck all, tick (Blanks), and click OK. Then fill in the codes you have. The guide to Shopify product feed issues explains which products need a GTIN and what to do when one has none.
Keep Amazon ASINs beside your UPCs
If you sell on Amazon too, add the Barcode (ASIN) column and paste each product’s ASIN from your Amazon listings. Your UPCs and EANs stay untouched in their own columns.
Export barcodes by type to Excel or CSV
Shopify’s own product export puts all of a variant’s barcodes into one Barcodes cell, such as upc:084217600109; ean:4262175001015. To get a file with one column per barcode type, export your worksheet from Mixtable instead:
- Add the barcode columns you need, as in Step 2
- If the sync control at the top right shows updates waiting from Shopify, for example Apply 3 updates, click it first so your file includes them
- Click Import & Export in the menu bar and choose Export to Excel or Export to CSV
Each type lands in its own column, next to the product title, SKU, and any other fields in your worksheet. That makes the file easy to send to a supplier, a warehouse, or a marketplace that asks for GTINs, and to check which variants still have no barcode of a type.
The Excel file stores barcodes as text, so leading zeros stay put. The CSV file keeps them too, but Excel drops them if you open a CSV by double-clicking it, so use the Excel file when you’ll work in Excel.
Exporting is free with Mixtable Export: Excel & CSV, so you can pull a barcode report without editing anything. Export Shopify products covers the export in more detail.
Things to know
- Barcode columns are on variant worksheets. They’re available on Products (with variants) worksheets, where each row is a variant
- Each type column shows one barcode. If a variant has two barcodes of the same type, the column shows and edits the first one, and the second stays as it is
- New barcodes go to the end of the variant’s list. Mixtable doesn’t reorder a variant’s barcodes. Check the Barcode column to see which code sales channels will read
- Shopify checks values when you sync. Mixtable sends each code as you typed it, and Shopify’s error tells you about any it refuses
Frequently asked questions
Can Shopify’s CSV import set barcode types?
Yes. Shopify’s product CSV has a Barcodes column that takes a type before each code, such as upc:012345678905, with semicolons between codes. All of a variant’s barcodes share that one cell, so a spreadsheet with a column per type is easier to edit and check.
Can I change barcode types in Shopify’s bulk editor? Shopify’s documentation says the bulk editor can update barcodes for many variants, but it doesn’t say it can set their types. In Mixtable, each type has its own column, so a type change is a copy and paste.
Which barcode does Google Shopping use? Shopify’s changelog says sales channels read a variant’s first barcode. The Barcode column in Mixtable shows that first barcode.
Do I have to give my existing barcodes a type? No. Shopify kept them working without one. Giving them a type tells Shopify which standard each code follows, so Shopify can check it, and helps you see at a glance which variants have a GTIN.
Can I export Shopify barcodes with their types? Yes. Add a column for each barcode type, then choose Import & Export > Export to Excel or Export to CSV. Each type gets its own column in the file, and the export is free with Mixtable Export: Excel & CSV.
Will my leading zeros survive? Yes. Barcode columns are text columns, so Mixtable keeps every digit, and Excel exports store them as text too. A CSV export keeps them in the file, but Excel drops them if you open the CSV by double-clicking it.
What happens if I paste an invalid code? Shopify refuses it when you sync, and the sync error names the row and the reason. Nothing changes in that variant’s barcodes until you fix the value and sync again.