
How to Add and Remove Shopify Tags in Bulk
 Spreadsheet Editor Updated October 8, 2026
 On this page
 How to Add and Remove Shopify Tags in BulkVideo walkthrough
 Tags help organize Shopify products, orders, and customers. With Mixtable Spreadsheet Editor, you can see those tags beside the rest of your Shopify data, update many rows at once, and review every pending change before syncing it to Shopify.
Mixtable gives you three ways to bulk edit tags:
| What you need to do | Best method |
|---|---|
| Set the complete tag list for each row | Edit the Tags column directly |
| Add or remove the same tags from every visible row | Use the Bulk Edit menu |
| Apply different product-tag actions to different rows | Use Action Columns |
Changes made with any of these methods remain pending in the spreadsheet until you intentionally click Sync.
Before you start
Install Mixtable Spreadsheet Editor, then open a Shopify data worksheet for the records whose tags you want to change:
- For product tags, use a Products (no variants) worksheet or the Basic Product Info template
- For order tags, use an Orders worksheet from the Orders and Order Items template
- For customer tags, use a Customers worksheet or the Customers template
Product tags belong to the parent Shopify product, not to individual variants. A Products (no variants) worksheet is usually the clearest place to manage them.
Add the Tags column
Some templates already include a Tags column. If yours does not, add it before using the direct-edit or Bulk Edit methods.
- Click + Shopify data in the header row of an empty column, or choose Column > Add Shopify data… from the menu bar. The field picker opens and asks What should column E show?, with your column’s letter in place of E
- Type Tags in the search box, or click the section that holds it in the list on the left: Organization for products, Notes & tags for orders, or Customer for customers
- Click Tags. On a Products (with variants) worksheet it’s marked Product, because Shopify tags belong to the product rather than the variant
- Click Save Column
Mixtable fills the column with the existing comma-separated Shopify tags for every row.
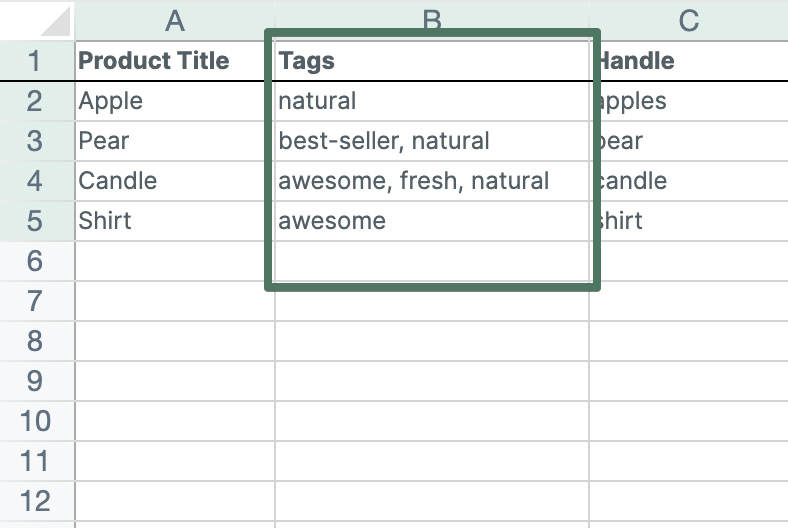
Edit the complete tag list in the Tags column
Use this method when you want to control the final tag list for each product, order, or customer.
- Find the row you want to update
- Edit its Tags cell and separate multiple tags with commas, for example
summer, sale, clearance - Copy and paste tag lists into more rows, fill values down, or use formulas when the pattern is repeatable
- Click Preview at the top right of the spreadsheet and review the old and new tag values
- Click Sync when the complete tag lists are correct
Editing the Tags cell replaces the complete tag list for that row. If a product currently has summer, blue and you change the cell to sale, Shopify will receive sale as the new complete list. Use the next two methods when you want to add or remove tags while keeping every other existing tag.
Add or remove the same tags from visible rows
The Add tags and Remove tags tools in the Bulk Edit menu are the fastest choice when the same tag change should apply to every row currently visible in the worksheet.
If the change should affect only part of your catalog, filter the Shopify data first. Hidden rows are not included in the bulk tag update.
- Confirm that the active worksheet has a mapped Tags column
- Open the Bulk Edit menu in the menu bar
- Select Add tags or Remove tags
- In the Bulk Edit Tags dialog, confirm the Add tag or Remove tag operation
- Enter one or more tags, using Enter or a comma to separate them
- Leave Preview first 10 rows turned on and review the Before and After values
- Click Update Spreadsheet
- Click Preview at the top right of the spreadsheet and review the complete pending update
- Click Sync to send the tag changes to Shopify
Update Spreadsheet changes the visible worksheet cells. It does not send anything to Shopify by itself, so you can still review or correct the results before syncing.
Add or remove different product tags with Action columns
Use Action columns when different Shopify products need different tag changes. Each row tells Mixtable which tags to add or remove from the product on that row.
Action columns are available on Products (no variants) and Products (with variants) worksheets. On a variant worksheet, the action changes the tags on the parent product because Shopify tags belong to products, not individual variants.
- Click + Shopify data in the header row of an empty column, or choose Column > Add Shopify data… from the menu bar
- In the field picker, click Action columns in the list of sections on the left
- Click Add tags or Remove tags, then click Save Column
- Enter the tag or tags for each product row. Separate multiple tags with commas
- Copy, paste, fill down, or use formulas to prepare the rows you want to update
- Click Preview at the top right of the spreadsheet and confirm the expected product-tag actions
- Click Sync to apply them
Leave an Action column cell blank when that row should not perform the action. For example, an Add tags cell containing summer, sale adds those two tags without replacing the product's other tags.
If an automated Shopify collection uses tags in its conditions, changing a product tag can also change whether that product belongs to the collection.
Learn more about Action columns.
Use Action columns for product tags only. The direct Tags column and Bulk Edit methods also support Shopify order and customer tags.
Which rows will Add tags and Remove tags change?
The tag tool updates the data rows currently visible in the active worksheet. This makes worksheet filters a useful safety check:
- Filter the worksheet to the products, orders, or customers you want to change
- Confirm that unrelated rows are hidden
- Open the Bulk Edit menu and run the tag operation
- Review the first 10 visible rows in the dialog
- Review the full pending change list before syncing to Shopify
If the worksheet is not filtered, the operation applies to all visible data rows.
Tag-management tips
- Use consistent spelling and capitalization so similar tags do not split into separate groups
- Prefer a small, documented set of operational tags over many near-duplicates
- Filter and review the affected rows before running a large tag update
- Use Action columns when the required tags differ by product
- Use the direct Tags column when you need to replace or reorganize the entire list
Shopify automated collections can use product tags as conditions. Adding or removing a product tag may therefore also change whether that product appears in an automated collection.
Once your product tags are consistent, Mixtable Analytics Spreadsheet can compare sales by tag with the Sales by Product Tag report. A product can have several tags, so the same order activity can count in more than one tag row.
Troubleshooting
Bulk Edit Tags says the worksheet has no Tags column
Map the Shopify Tags field to a column (see Add the Tags column), then choose Bulk Edit > Add tags or Remove tags again. On a Products (with variants) worksheet, that’s the Tags field marked Product, because Shopify tags belong to the product rather than the variant.
The action-column option is missing
Action columns for tags require a Products (no variants) or Products (with variants) worksheet. Use the mapped Tags column or the Bulk Edit menu for order and customer tags.
Update Spreadsheet ran, but Shopify did not change
That is expected. Update Spreadsheet prepares pending cell changes only. Click Preview, then Sync when you are ready to apply them.
More rows changed than expected
Do not sync yet. Correct the worksheet cells or undo the spreadsheet edit, then filter the worksheet before running the bulk operation again.