Action columns for editing Shopify products in bulk
Action columns for editing Shopify products in bulk
Imagine the power to effortlessly manage your Shopify store’s tags, manual collections, and product images, not one by one in the admin, but in bulk, right from the familiar interface of an online spreadsheet. Say hello to Action Columns in Mixtable! Action Columns bring a new level of efficiency to your workflow, allowing you to add or remove tags, add or remove products from collections, and add images to products with just a few clicks. Here’s how they work.
How to set up Action Columns for your Shopify Products
To use Action Columns you’ll need a Mixtable spreadsheet that contains a worksheet with your Shopify product data. If you haven’t created one yet, start by installing the Mixtable Spreadsheet Editor app from the Shopify App Store. Once that’s done, you can quickly create a spreadsheet and set up your Action Columns just a few clicks.
Note: The worksheet needs to show product information. Action Columns are supported on both Products (no variants) and Products (with variants) worksheets.
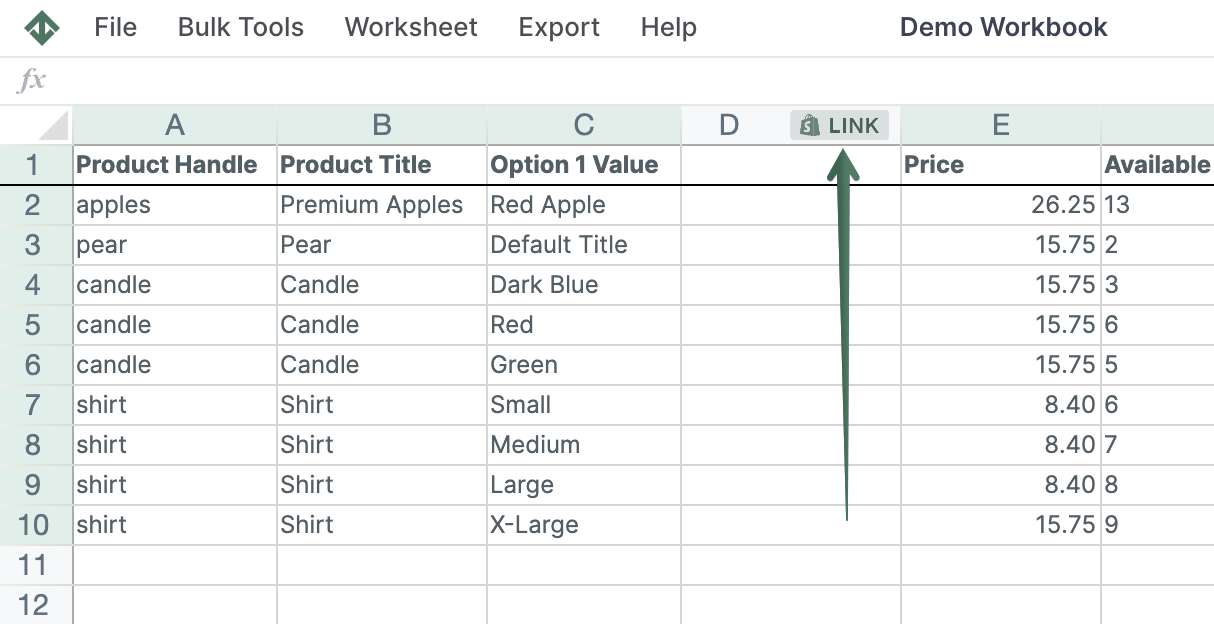
To load new Shopify data, start by selecting an empty column — any column with a non-green header (green headers mean the column is already linked to Shopify data). Then, click the  button in the column header to open the selection window to choose the data you want to pull in.
From the Shopify Sync Settings window, choose Action Columns.

Then, from the drop-down list, you can choose a column to add:
- Add Tags
- Remove Tags
- Add to Collections
- Remove from Collections
- Add Images
Add or remove Shopify tags from products
You can quickly add or remove tags once you link the Add Tags and/or Remove Tags columns to your products’ spreadsheet. Here’s how:
- Add a new tag in the Add Tags column
- Add a tag you want to remove in the Remove Tags column
- Click Sync to Shopify
- Allow some time for the changes to take place
Note: If you have rules for automated collections based on tags, the new tags will add products to automated collections, and correspondingly, the removed tags will remove them from the automated collections.
Add or remove Shopify products from Manual Collections
You can quickly add or remove products once you link the Add to Collection and/or Remove from Collection columns to your products’ spreadsheet. Here’s how:
- Click the (+) button and select a new manual collection to which to add the product
- Click the (+) button and deselect a manual collection from which you want to remove the product
- You can use filtering and copy-paste to do that to multiple products
- Click Sync to Shopify
- Allow some time for the changes to take place
Add Shopify product images from URLs
You can also use Action Columns to add product images in bulk by URL.
- Add an Add Images Action Column
- Enter one image URL in a cell, or multiple URLs separated with semicolons (
;) - Sync to Shopify
For full step-by-step instructions, see Add Shopify product images in bulk with an Action Column
You are ready!
Well done! Now that you have Action Columns data in an online spreadsheet, you can use any Excel function to analyze the data, such as:
- Sort ascending or descending,
- Find-replace,
- Filter,
- Use Excel formulas, e.g., for price changes, etc.
Find out more about the Mixtable suite of products here.
Manage Shopify data in a spreadsheet.
Use Mixtable to edit, sync, analyze, import, and export your Shopify store data without CSV juggling.