Manage Shopify product images
Manage Shopify product images
Mixtable’s spreadsheet interface makes it easy to add images to your products, edit existing images, and remove images that are no longer needed. You can do this via the spreadsheet cells themselves or by using the Shopify sidebar.
Quick way to add product images in bulk
If your images are already hosted and you have their URLs, use the Add Images Action Column. This lets you paste image URLs into cells and sync them to Shopify in bulk.
- One URL adds one image
- Multiple URLs in one cell should be separated by semicolons (
;)
See the full walkthrough here: Add Shopify product images in bulk with an Action Column
Manage images from within the spreadsheet
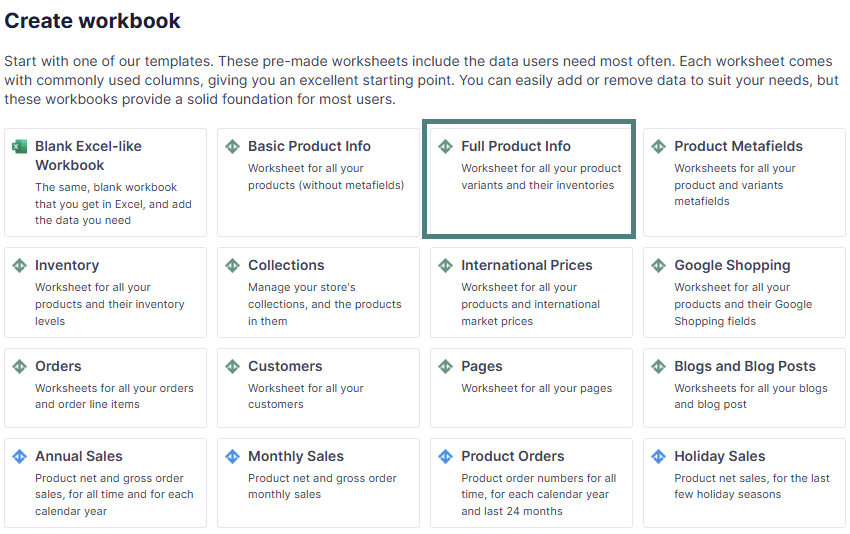
Ensure that you have a worksheet mapped to sync with the products of your Shopify store. You can do that by loading the pre-built Basic Product Info or Full Product Info spreadsheet templates or by adding а Products (with variants) worksheet (see how here).
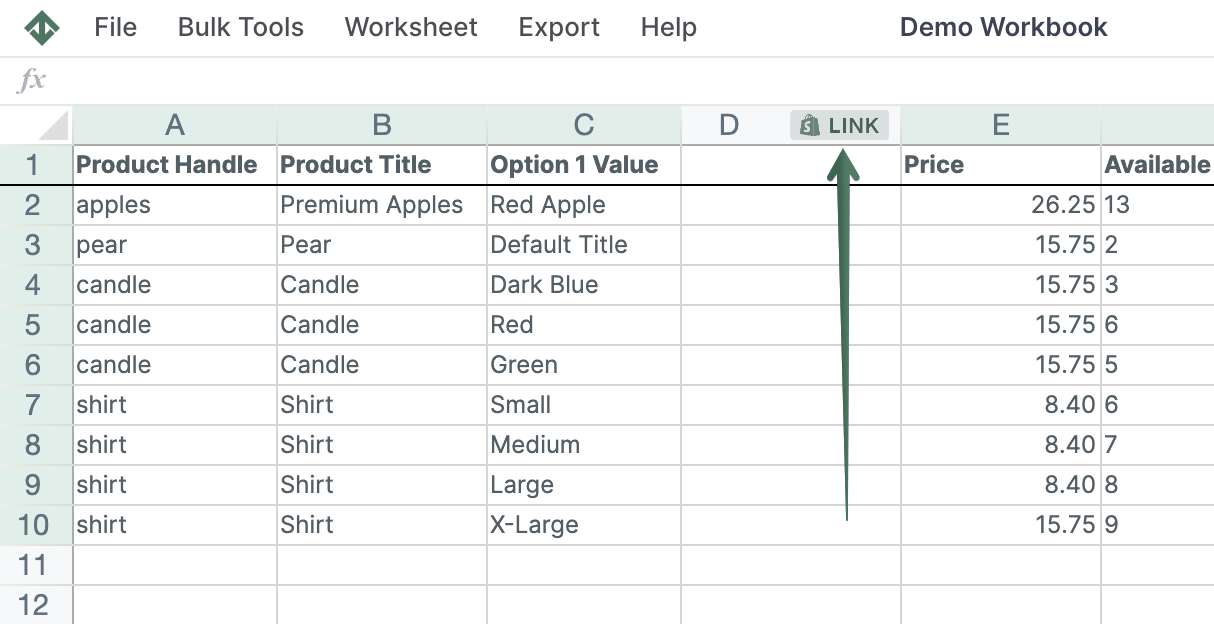
To load new Shopify data, start by selecting an empty column — any column with a non-green header (green headers mean the column is already linked to Shopify data). Then, click the  button in the column header to open the selection window to choose the data you want to pull in.
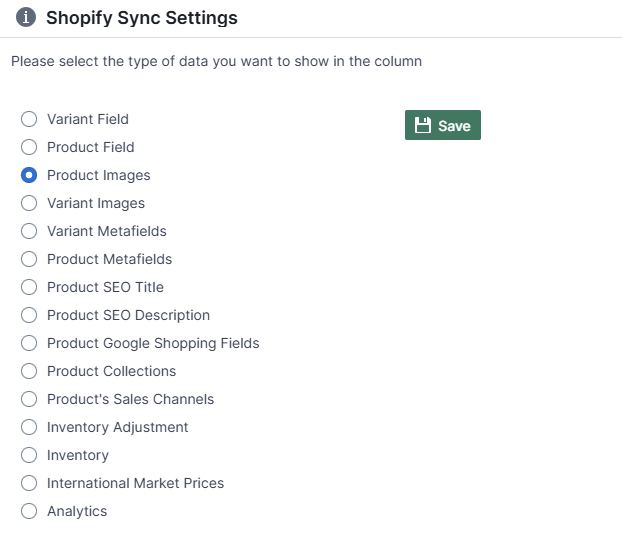
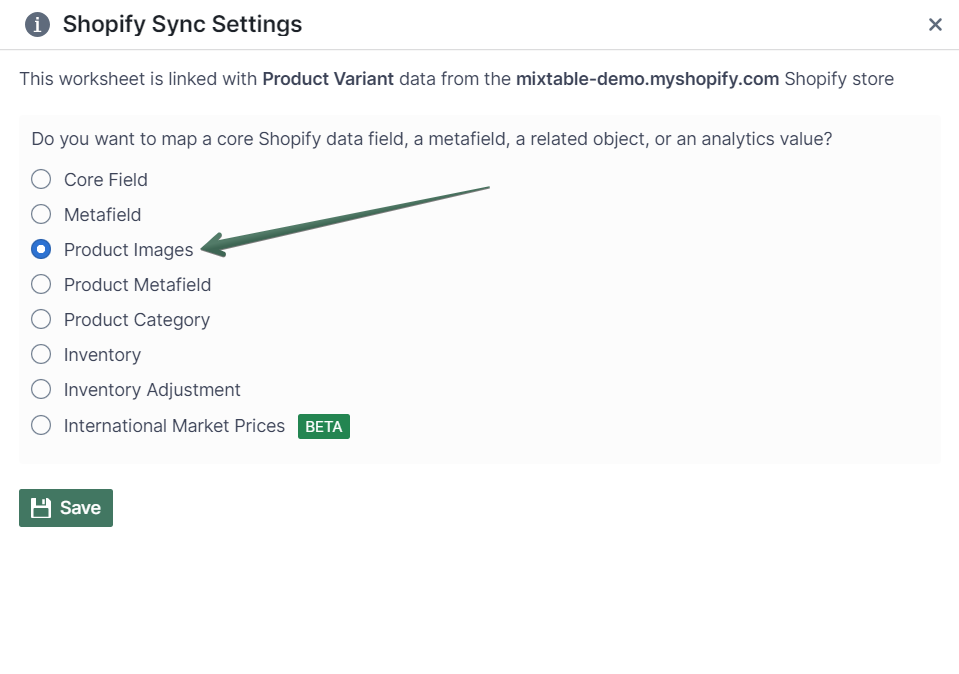
Select the Shopify Sync Settings option.
In the window that opens, select Product Images. Click the Save button to save the new column mapping.
The new column will start populating almost immediately with thumbnails of any images currently available for each product.
Add images to products via a spreadsheet
Now that our images are synced to a column, we can add new ones. Each cell in the column mapped to your product images will have a button with a + symbol. Clicking this button will present you with the Add Image widget.
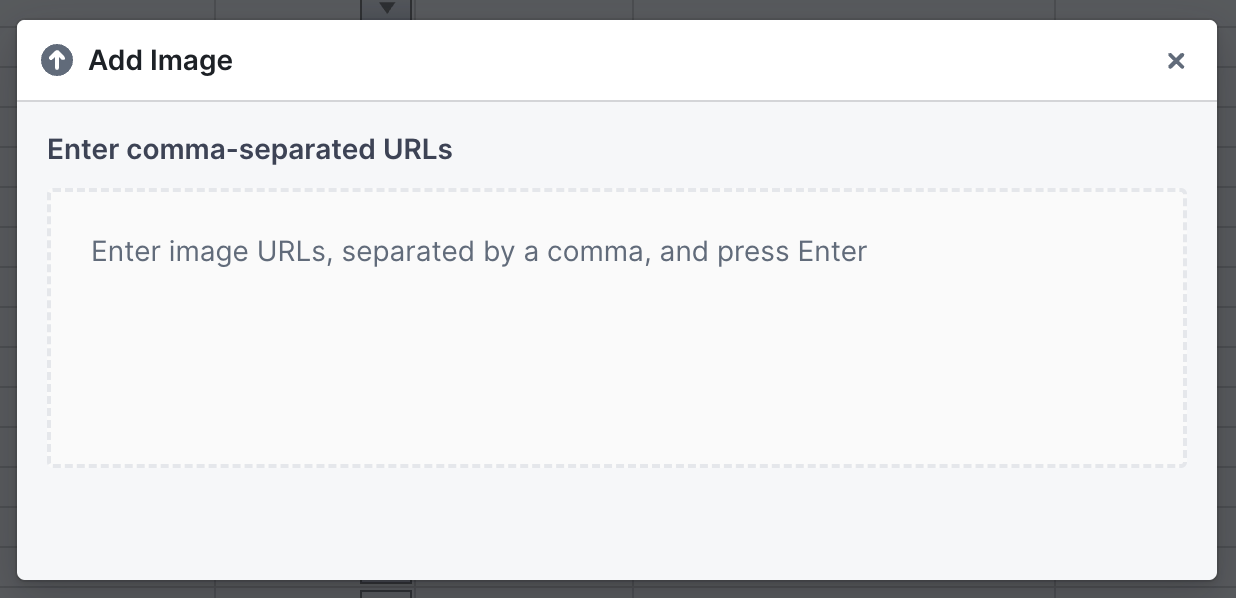
The Add Image widget allows you to add images by entering URLs that point to images on the internet. To add images from URLs, paste the URLs separated by a comma and press Enter. Mixtable will take the URLs and immediately send them to Shopify.
Delete a product image via a spreadsheet
If you click on one of the thumbnail images in a cell showing a product’s images, you’ll open the Image Editor widget. Clicking on the Delete Image button here will remove this image from your product in Shopify.
Manage images from Products (with variants) or Media Images worksheet
Updating or adding images to products in Shopify can be done efficiently through the Products—Complete (with Variants) worksheet in Mixtable and the Media Images sheet. Follow this guide to streamline your workflow and enhance the visual appeal of your products.
1. Access/Add a Products (with variants) Worksheet
Navigate to the Products (with variants) worksheet, where you manage your product data. This is where you’ll perform the updates/additions to your product images.
2. Choose an Image Column
Identify the column in which you want to add or update product images. Right-click on the selected column to reveal a context menu and click on Shopify Sync Settings. In the context menu, locate and click “Shopify Sync Settings.” This option opens a submenu with various synchronization settings for Shopify.
3. Add Product Images to a column
In the Shopify Sync Settings submenu, find and click on the Product Images radio button. After selecting the Product Images radio button, save your changes to apply the synchronization settings. This ensures that the chosen column will now be associated with Product images. Save the changes to apply the new column to your worksheet.
4. Editing
After you have the column populated, you can simply edit the images that have already been downloaded from your Shopify store to Mixtable using the Edit button or add new images using the [+] button.
Manage Images from the Media Images worksheet
Editing images in Shopify can be done efficiently through the Media Images worksheet in Mixtable. Follow this guide to streamline your workflow and enhance the visual appeal of your products.
1. Load the Media Images Worksheet
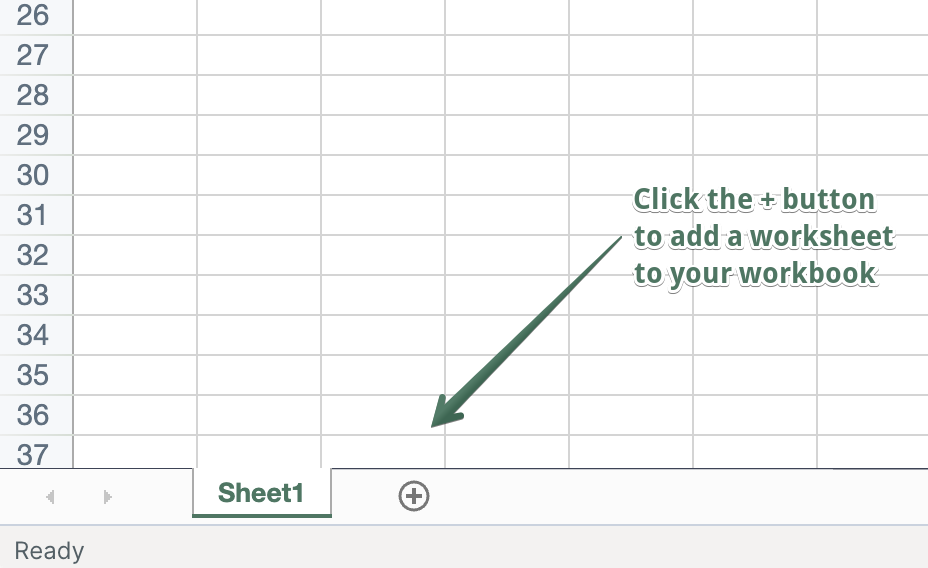
In an existing Mixtable spreadsheet, click the (+) button to add a new worksheet.
2. Add/Edit/Delete Shopify Images
In the Media Images worksheet, you will see all the images available in your store. You can now edit, add, or remove images from here.

Note: Shopify does not notify Mixtable when product images are added or updated. To download the latest image data from Shopify, click the Media images download button in the Shopify sync widget.
You're ready!
Mixtable is an online spreadsheet designed to sync data with Shopify. It looks, feels, and behaves like Excel (including formulas), but runs in your browser. With Mixtable you can:
- Bulk add products to collections, edit metafields, add or remove tags;
- Change product prices, including international prices, and review price history;
- Manage customers with a spreadsheet CRM for Shopify;
- Use Excel features like sort ascending or descending, find-replace, filter, and more.
Best of all, you can sync changes back to Shopify with a single click. Find out more about the Mixtable suite of products here.
Manage Shopify data in a spreadsheet.
Use Mixtable to edit, sync, analyze, import, and export your Shopify store data without CSV juggling.