Manage your Shopify store with Mixtable
Manage your Shopify store with Mixtable
This page explains the core concepts you need to be aware of when using Mixtable for the purpose of synchronizing data to/from your Shopify store. Please note that the content below assumes that you have already linked your Shopify store with Mixtable.
Creating a Shopify-linked spreadsheet
To get going, click the Create Spreadsheet button on your Mixtable dashboard. In the dialog that opens, you can pick from a variety of pre-built templates organized by category (Products, Inventory & Pricing, Orders & Customers, Organization, Content, Integrations, and Analytics), or start from scratch with a Blank Excel-like Spreadsheet. Each template comes pre-configured with the columns you need, so you can start editing right away.
Adding a Shopify-linked worksheet
At any time, and from any spreadsheet you can add a new worksheet that is linked to Shopify data.
In an existing Mixtable spreadsheet, click the (+) button to add a new worksheet.
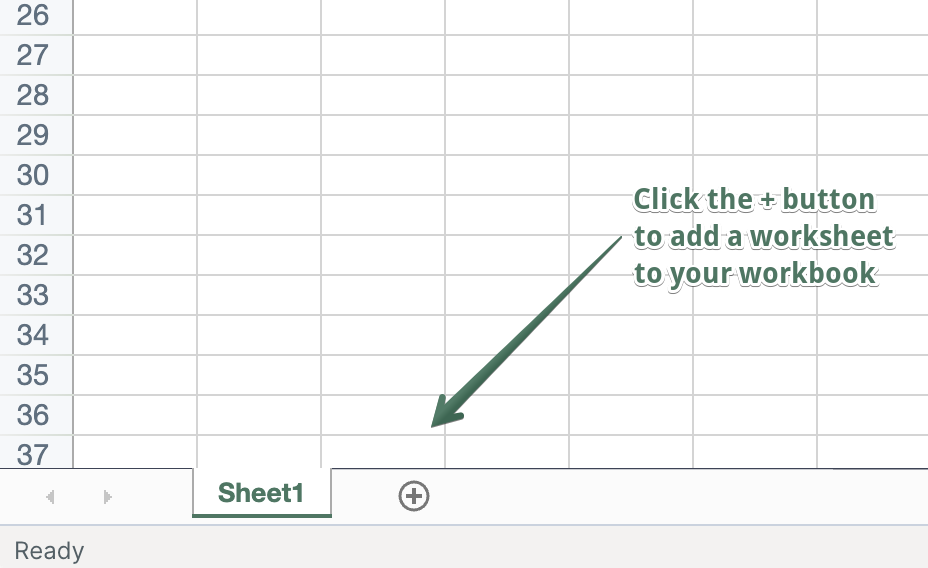
Now you’ll be asked whether you want to create a Basic Worksheet (blank, Excel-like new worksheet), or one that is integrated with Shopify data. The Shopify worksheet options are broken down by the type of data you want to sync (e.g., Products, Orders (no line items), Orders (with line items)). Select the Shopify worksheet you’d like to add, and it will be immediately added to your spreadsheet. You’ll also see that it will immediately start populating with any existing data from Shopify.
Syncing data from Shopify to Mixtable
Data is synced from Shopify to Mixtable automatically, whenever something is created/updated in Shopify, although it will take a few seconds for Shopify to notify Mixtable of the change, and Mixtable to process the data. If you don’t have your Shopify spreadsheet open the change will be made in the background and you’ll see the updated data next time you open the spreadsheet. If the spreadsheet is currently open in your browser, then you’ll see the relevant cell(s) change their values, and they will be highlighted for a few seconds with a green border.
Syncing data from Mixtable to Shopify
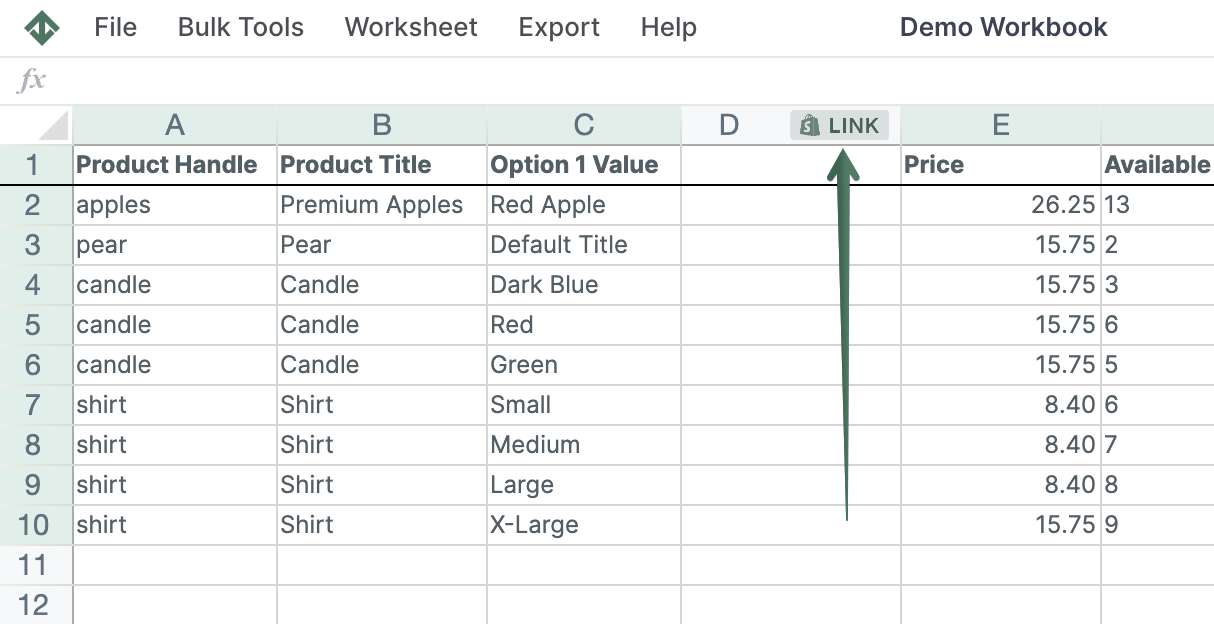
To sync a piece of data from Mixtable to Shopify first update the relevant cell with the new data. The updated cell will be highlighted, showing that it has been saved in Mixtable’s database, _but has not yet _been sent to Shopify. The cell will stay highlighted even if you reload the spreadsheet, allowing you to make changes over time and sync them to Shopify when you are good and ready.
To actually sync the changes you’ve made click on the Sync to Shopify button on the right side of the worksheet. The highlighted cells will once again get a white background, and you’ll see an indication on the toolbar that the sync is tacking place.
If you’d like to double-check what will update before anything reaches Shopify, click Preview changes next to the Sync to Shopify button to review every pending edit. See Preview Shopify changes before syncing for details.
Mapping spreadsheet columns to Shopify data
Not all Shopify data is displayed in every worksheet at all times. To make a column show a particular field (e.g., the product’s description), you need to map a column to the field.
To load new Shopify data, start by selecting an empty column — any column with a non-green header (green headers mean the column is already linked to Shopify data). Then, click the  button in the column header to open the selection window to choose the data you want to pull in.
In the window that opens, you have a choice whether to map Shopify data fields, a Metafield, a Mixtable Analytics field, and other options that will change depending on which Shopify data is stored in the worksheet.
Once you’ve selected the field you want to map to the column click on Save and you’ll see any existing Shopify data start to populate in the column.
Using Excel formulas in your Shopify worksheets
Just like you would in Excel, you can use formulas to set a Shopify value in the spreadsheet. The cell’s value can then be synced to Shopify as it changes based on the inputs. One thing to keep in mind is that if a cell contains a formula, then its content will only sync from Mixtable to Shopify. The cell’s content will not be affected if the underlying data changes in Shopify.
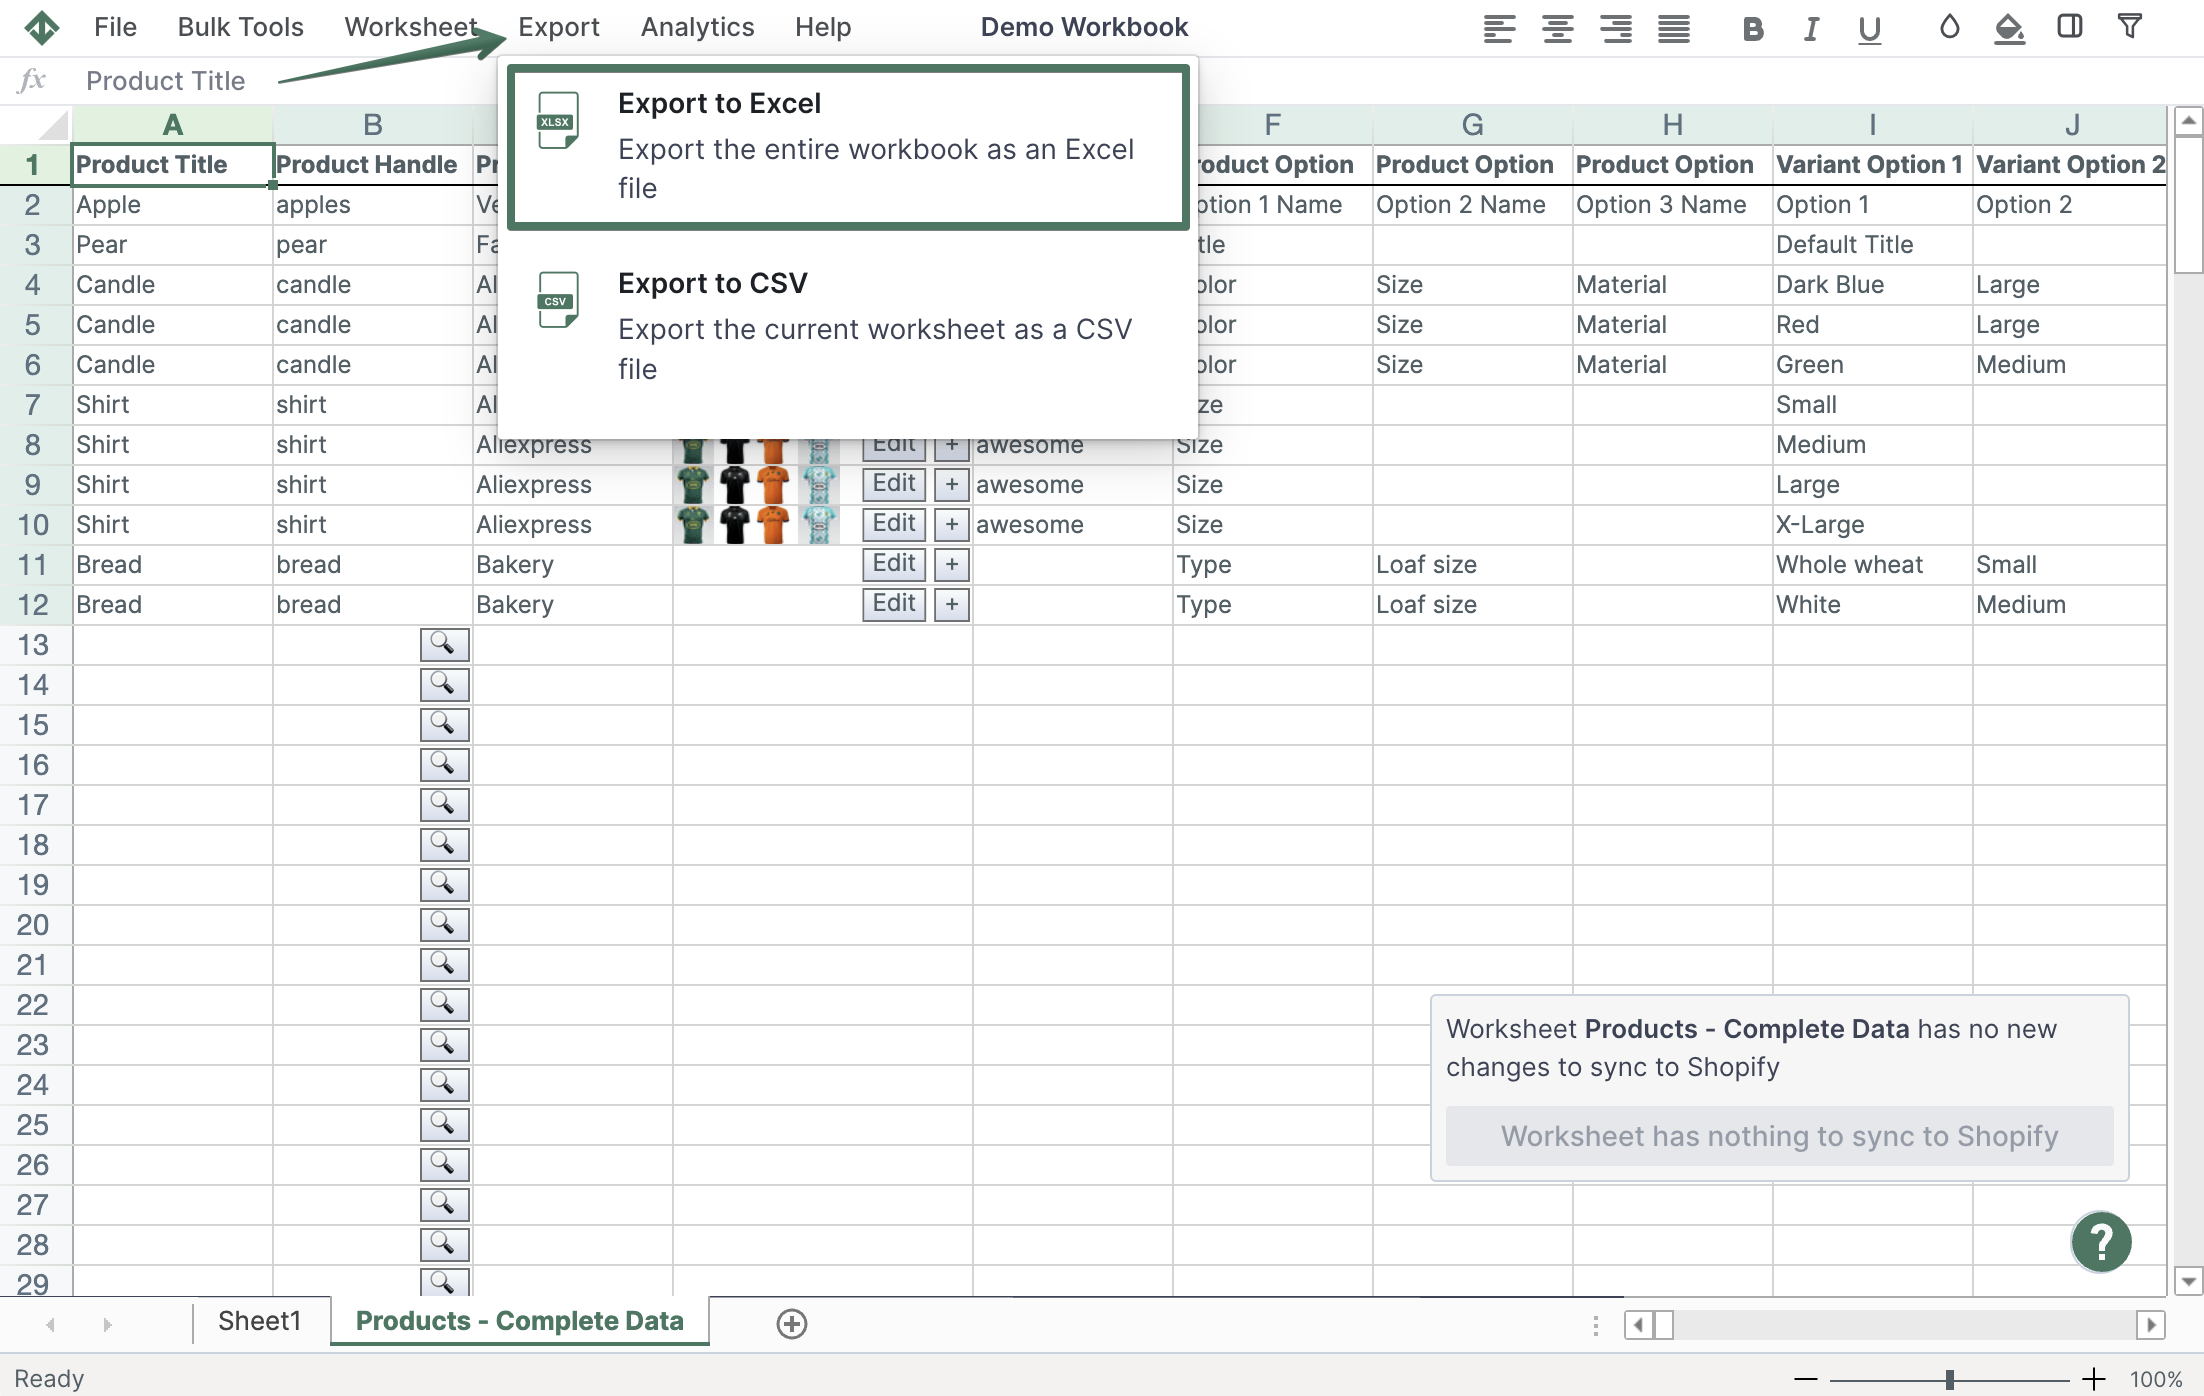
Exporting Shopify data to Excel .xlsx file
At any time, you can export your entire spreadsheet to an Excel XLSX file. Click Import & Export in the top toolbar, then select Export to Excel. The file will be downloaded to your computer right away.
To export the current worksheet as a CSV file instead, select Export to CSV from the same menu.
Manage Shopify data in a spreadsheet.
Use Mixtable to edit, sync, analyze, import, and export your Shopify store data without CSV juggling.