
Bulk update SEO titles and SEO descriptions for Shopify blog posts
 Spreadsheet Editor Updated October 8, 2026
 On this page
SEO titles and SEO descriptions (meta descriptions) are what Google often uses to understand and display your blog posts in search results. Keeping them consistent, accurate, and keyword-focused improves both rankings and click-through rates.
With Mixtable Spreadsheet Editor, you can create and manage blog post SEO titles and SEO descriptions in bulk. Instead of opening and editing each post in Shopify, you can work on SEO fields in a spreadsheet and sync changes back to Shopify.
This guide focuses only on blog posts. Mixtable also supports SEO editing for Products, Collections, and Pages.
If your store is multilingual, you can also translate your blog post SEO titles and meta descriptions into each language and sync them to Shopify.
Why use a spreadsheet to manage blog post SEO?
Editing blog post SEO fields in a spreadsheet makes it easier to:
- Audit SEO titles and descriptions for all posts at once
- Standardize formatting (prefixes, separators, brand, date patterns)
- Fill in missing meta descriptions quickly
- Use formulas to create consistent SEO titles across categories
- Download the latest Shopify blog post SEO values before bulk editing
Load blog post SEO fields into your Mixtable spreadsheet
Before you can edit SEO titles and descriptions, you need to load those fields into a blog post-synced worksheet.
Create a blog posts worksheet
Start by setting up a spreadsheet in Mixtable and creating a worksheet that syncs with your Blog Post data from Shopify. Once the worksheet loads, your existing blog posts will appear in rows, with one row per post.
Note: If you don’t already have a blog post worksheet, the Blogs and Blog Posts template is a quick way to start. See Bulk edit Shopify blog posts.
Add SEO title and SEO description columns
To add the SEO fields:
- Open your Blog Posts worksheet
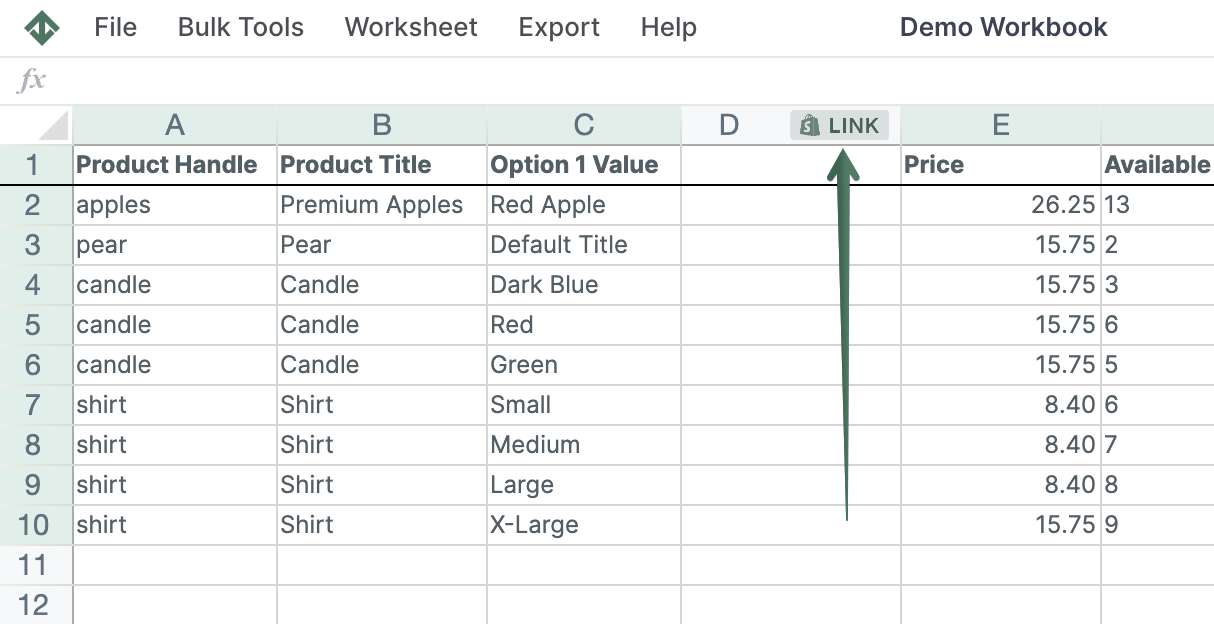
- To load more Shopify data, click + Shopify data in the header row of an empty column, such as the one right after your last column. You can also choose Column > Add Shopify data… from the menu bar. The field picker opens and asks What should column E show?, with your column's letter in place of E. It lists everything the worksheet can show from Shopify, grouped into sections the way your Shopify admin groups them. Type in the search box at the top, or click a section on the left, to find the field you want.
- Click Search engine listing in the list of sections on the left, or type SEO in the search box
- Click SEO title or SEO description, then click Save Column
- To add the other field too, repeat steps 2 to 4
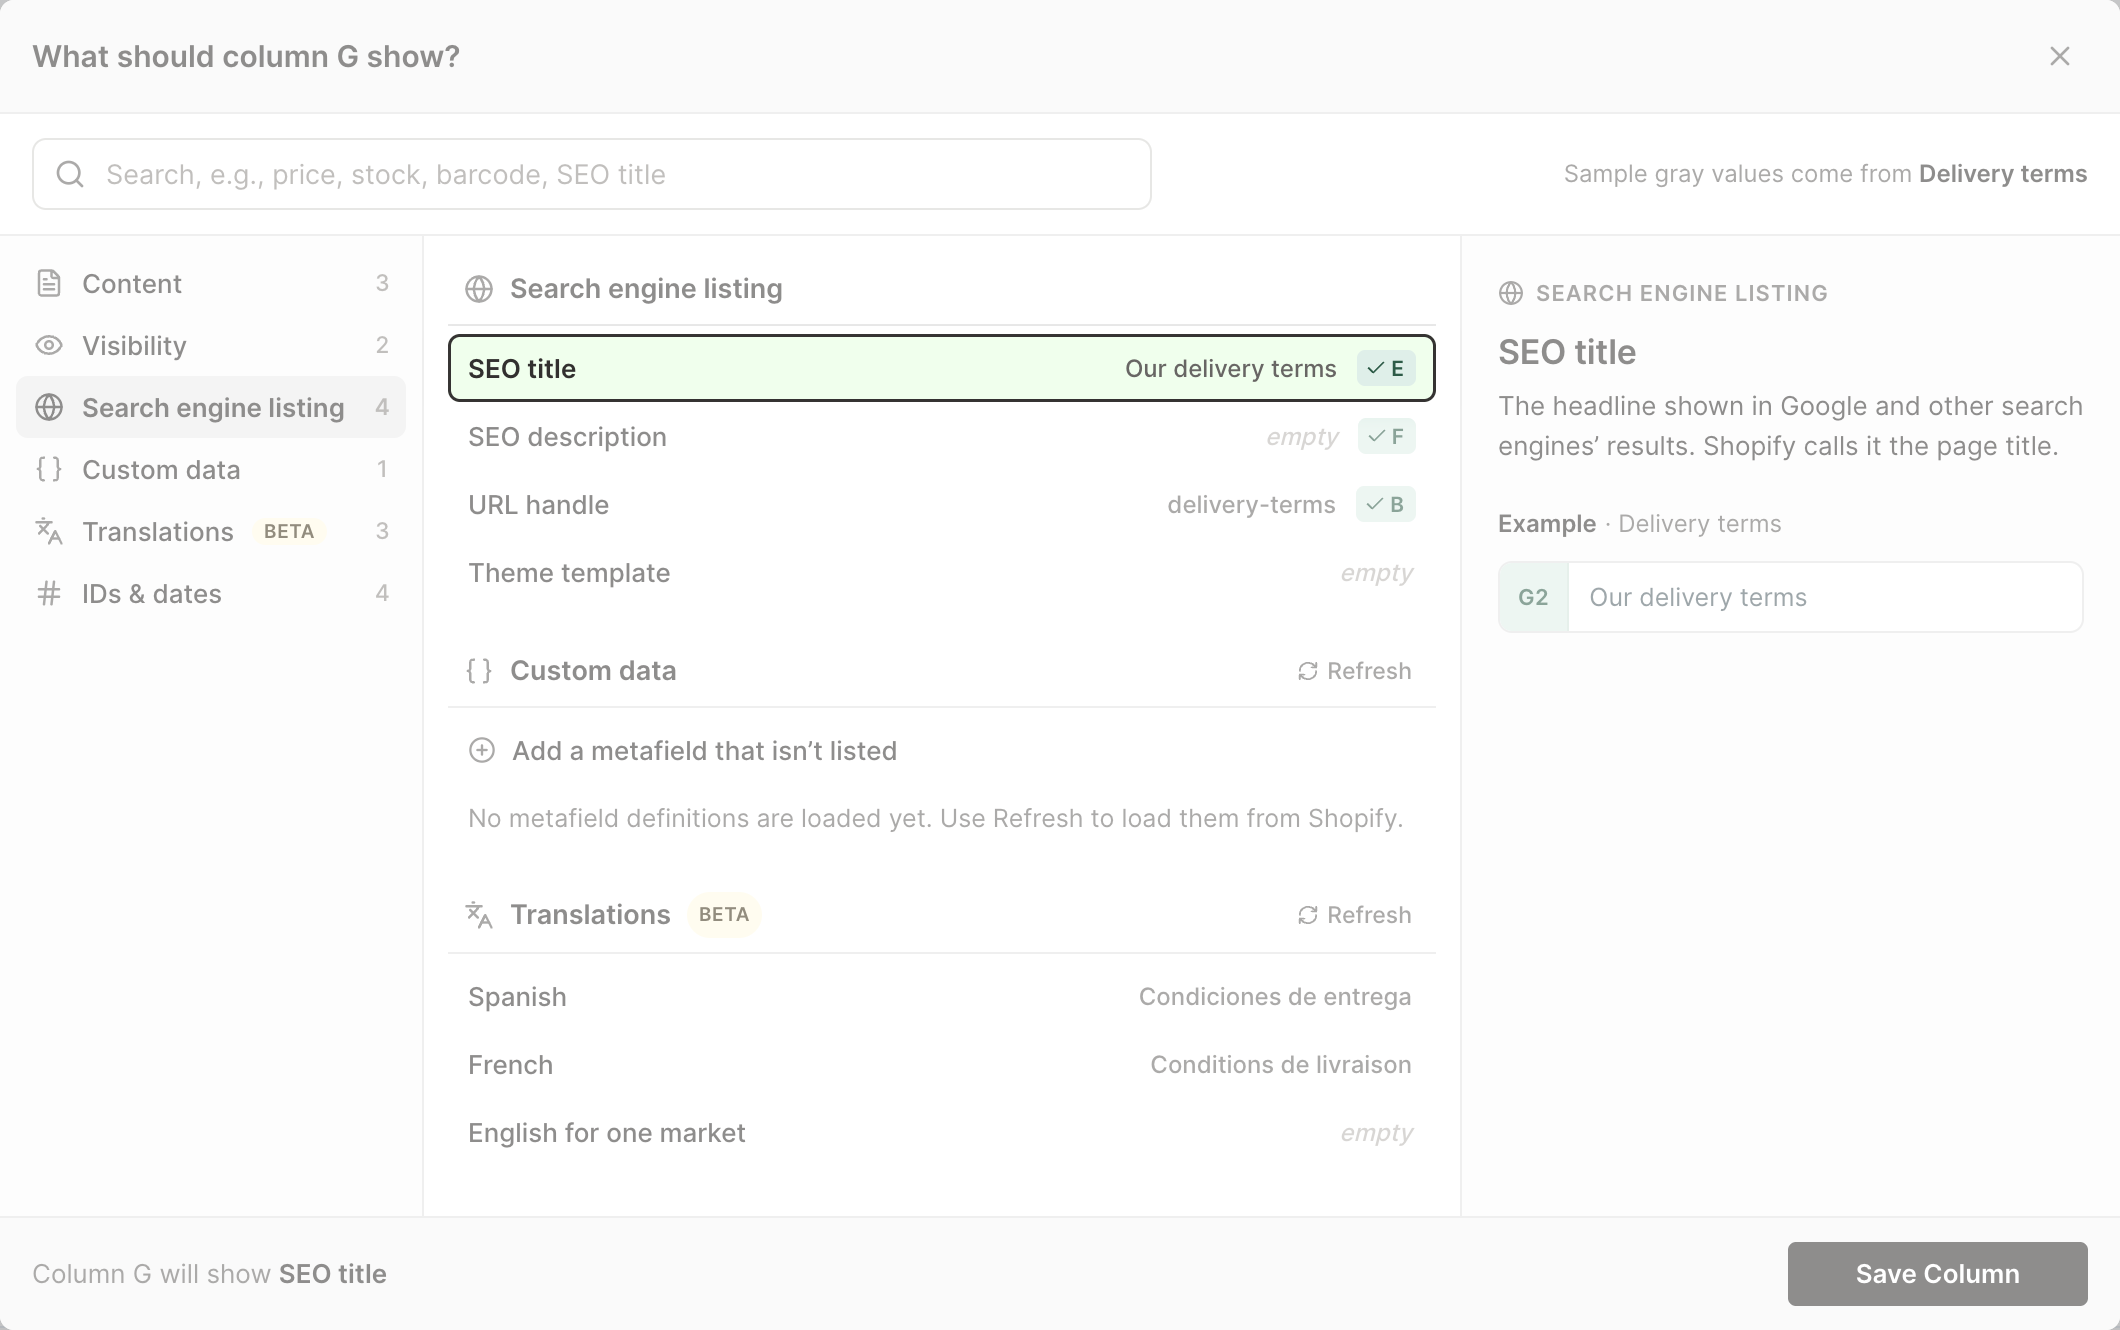
As soon as you add a field, Mixtable populates the column with your existing SEO data from Shopify. The new columns are headed SEO title and SEO description, and their cells are fully editable.
Edit blog post SEO titles and descriptions directly in the spreadsheet
Once the SEO fields are visible, you can edit them just like any other spreadsheet data:
- Write SEO titles that match the post topic and target keywords
- Refresh titles/descriptions when posts are updated
- Remove duplicated phrases across related posts
- Fix capitalization and punctuation inconsistencies
- Fill in missing SEO data at scale
When you’re happy with your edits, click Preview at the top right of the spreadsheet to review them, then click Sync to send them to Shopify without updating each post individually.
Bulk find and replace blog post SEO text
For large-scale changes, Mixtable’s Find and Replace feature is the fastest way to update blog post SEO titles and SEO descriptions.
How Find and Replace works
Choose Bulk Edit > Find and Replace from the menu bar. Or right-click the SEO column’s letter and choose Find and replace…, which opens the dialog with that column already chosen. In the dialog, you can control exactly how the update is applied:
- Column Selector
Choose the column to apply the change to, such as your SEO title or SEO description column. - Find this
The word or phrase you want to replace. - Replace with this
The new word or phrase to insert. - Case-sensitive match
Decide whether capitalization must match exactly. - Match whole words only
Limit replacements to exact word matches instead of partial matches. - Preview first 10 rows
Preview how the change will look before applying it to all blog posts.
Click Update Spreadsheet, and Mixtable applies the change to every blog post in that column (only the visible rows, if you’ve filtered the worksheet). Then click Preview at the top right of the spreadsheet to review the pending changes, and click Sync to send them to Shopify.
Final notes
Using Mixtable as a spreadsheet editor for Shopify blog post SEO gives you visibility and control over your entire content library, without the slow workflow of editing posts one at a time in Shopify.