
Google Shopping Template
 Spreadsheet Editor Updated October 8, 2026
 On this page
If you run Google Shopping ads for your Shopify store, the product data behind them needs to be complete and accurate. Google looks at things like:
- Clear, detailed product titles that include the brand, model, and key features
- Good product images that show the item clearly
- Accurate availability, so shoppers don’t click on items that are out of stock
- Correct prices that match what shoppers see in your store
- Product attributes such as condition, color, size, and Google product category, which help Google show your products in the right searches
Missing or out-of-date details can lead to disapproved products and weaker ad performance. The Google Shopping template in Mixtable puts the Google Shopping fields for your products and variants in a spreadsheet, so you can fill in the gaps and keep them up to date for your whole catalog at once.
How to load the Google Shopping template
After installing the Mixtable Spreadsheet Editor app, create a spreadsheet from the template:
Open your Mixtable dashboard and click Create spreadsheet at the top of the page. If you haven't created a spreadsheet yet, click Browse all templates below the starting-point cards instead. In the Create spreadsheet window, find Google Shopping under Integrations, or type its name in the search box, and click it. Mixtable creates the spreadsheet and fills it with data from your Shopify store.
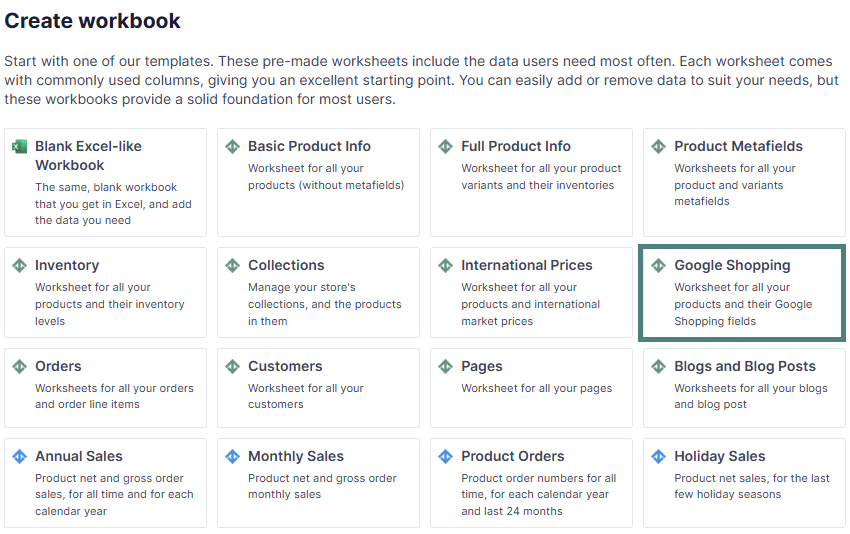
Now you can bulk edit the Google Shopping fields for your Shopify products and variants.
Selling on a marketplace instead? The Mirakl export template in the same Integrations group lets you export Shopify products to Mirakl marketplaces with one row per variant.
What data is included in the Google Shopping template
The template creates two worksheets, because Shopify can store Google Shopping fields on a product or on each of its variants.
The Google Shopping Products worksheet has one row per product and these columns:
- Product Title
- Age
- Google product category
- Condition
- This is a custom product
- Manufacturer Part Number (MPN)
- Gender
- Color
- Material
- Size, Size system, and Size type
- Unit pricing measure and Unit pricing measure unit
- Unit pricing base measure and Unit pricing base measure unit
- Custom Label 0 to Custom Label 4
The Google Shopping Variants worksheet has one row per variant. It starts with Product Title, SKU, and Option 1 to Option 3, followed by the same Google Shopping fields, except This is a custom product, which only applies to products.
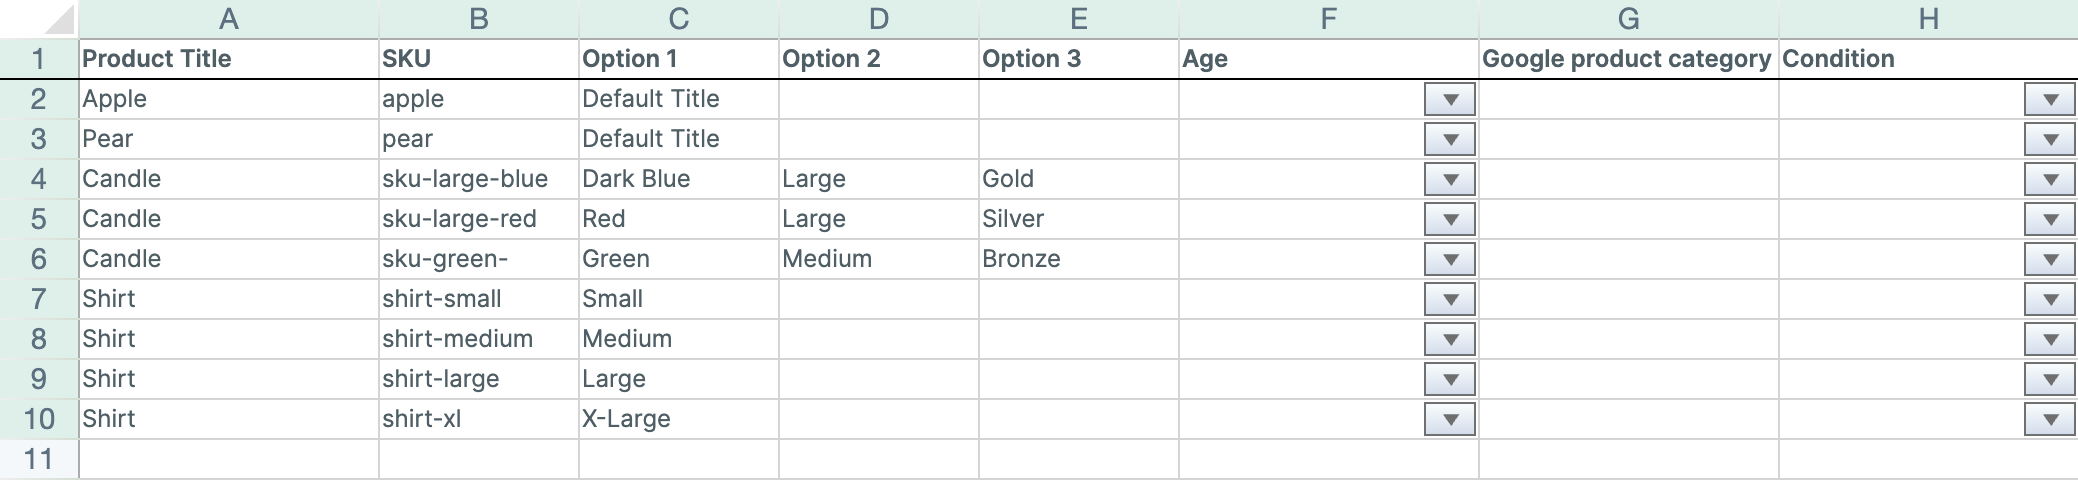
Use the products worksheet for values every variant shares, such as Google product category or condition, and the variants worksheet for values that change from one variant to the next, such as color, size, or MPN. For each product, fill in a field in one place only, so it’s clear which value Google uses.
Fill in missing Google Shopping data
Look for empty cells and fill them in. When a field only accepts certain values, such as Condition, the cells have a drop-down to pick from. When you’re done, click Preview at the top right of the spreadsheet to review your changes, then click Sync to send them to Shopify.
Complete, accurate fields help your Google Shopping ads keep running and reach the right shoppers.
Add price and inventory data to your Google Shopping spreadsheet
The Google Shopping Variants worksheet has one row per variant, so you can add price and stock columns right next to its Google fields:
-
Click the Google Shopping Variants tab at the bottom of the screen
-
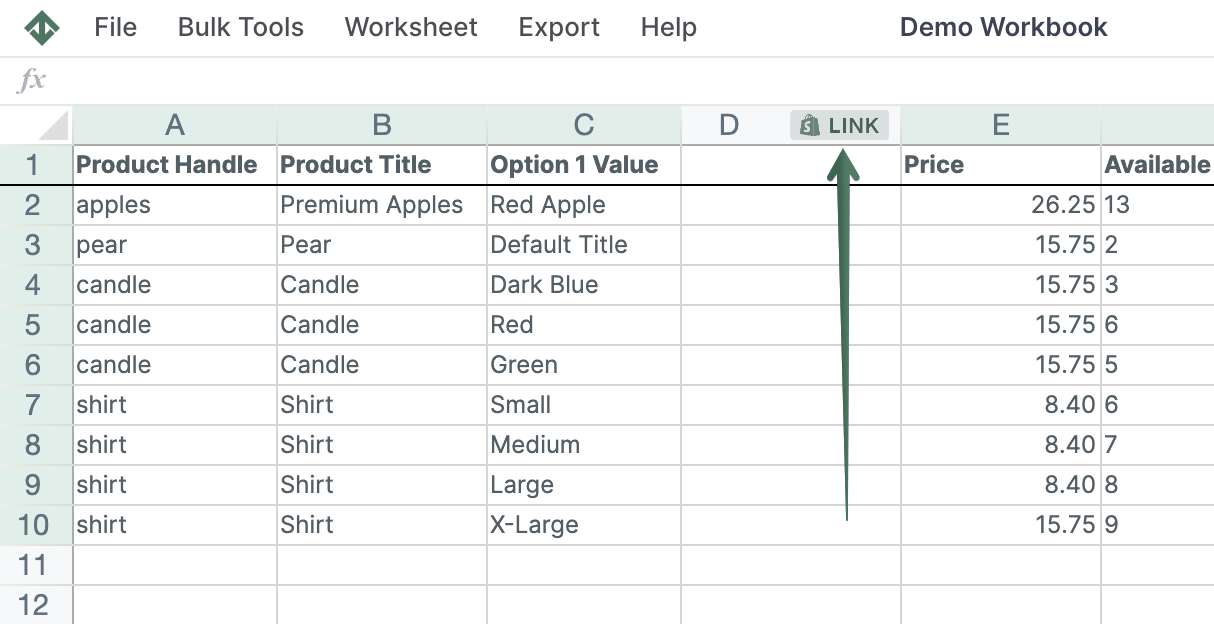
To load more Shopify data, click + Shopify data in the header row of an empty column, such as the one right after your last column. You can also choose Column > Add Shopify data… from the menu bar. The field picker opens and asks What should column E show?, with your column's letter in place of E. It lists everything the worksheet can show from Shopify, grouped into sections the way your Shopify admin groups them. Type in the search box at the top, or click a section on the left, to find the field you want.
-
Click Pricing in the list of sections on the left, or type “price” in the search box. Click Price, then click Save Column
-
To check stock, add another column. In the Inventory section, click the Stock at row for your location, such as Stock at Main Warehouse, leave Available selected, then click Save Column
Use these columns to make sure your prices are competitive and your stock levels are accurate. To review your product images too, click the + button after the worksheet tabs and add a Media Images worksheet, then check that your images meet Google’s requirements.