Add variants to your Shopify products in bulk
Shopify Product Variants are different options for a single product. For example, if you sell T-shirts and offer sizes S, M, L, and XL and the colors Red, Blue, and Green, each combination would be considered a unique variant of that T-shirt product. The Product Variant feature in Shopify helps store owners manage and organize their inventory efficiently, keeping track of stock levels and prices for each variant.
Update: In the Winter Update of 2024, Shopify increased the maximum number of product variants from 100 to 2,000.
Here, you will find 3 options for adding and editing product variants in Shopify.
Option 1: Add/Edit Variants to Shopify via Shopify Admin.
- Go to Shopify Admin > Products
- Select a Product and go to the Variants Section.
- By default, Shopify allows you to select from three variant options: Size, Color, and Material. You can also add other custom options.
- Add the Variant Options.
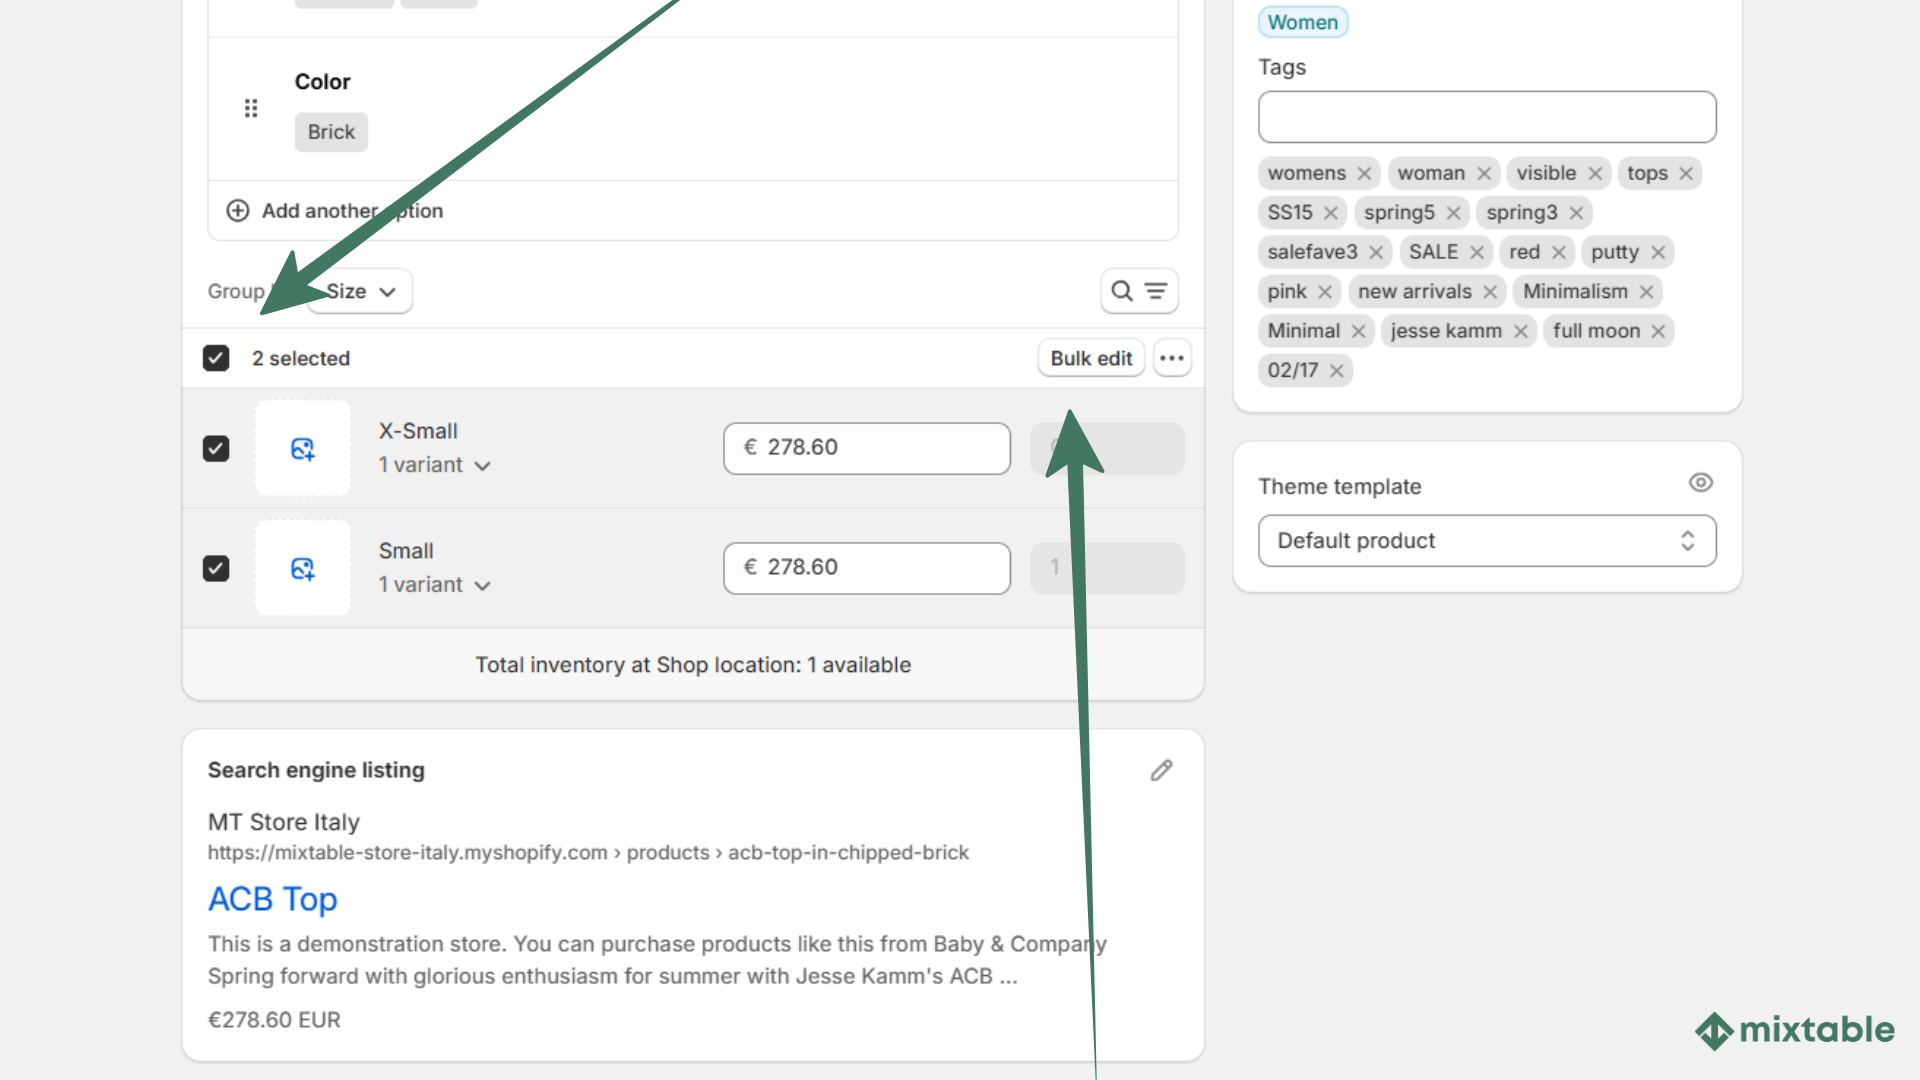
- Now you can add Product Variant specifics via a Bulk Editor - select the variants you want to edit and click Bulk Edit.
- You can edit prices, quantities, SKUs, and more.

Option 2: Add/Edit Variants via .CSV Export/Import
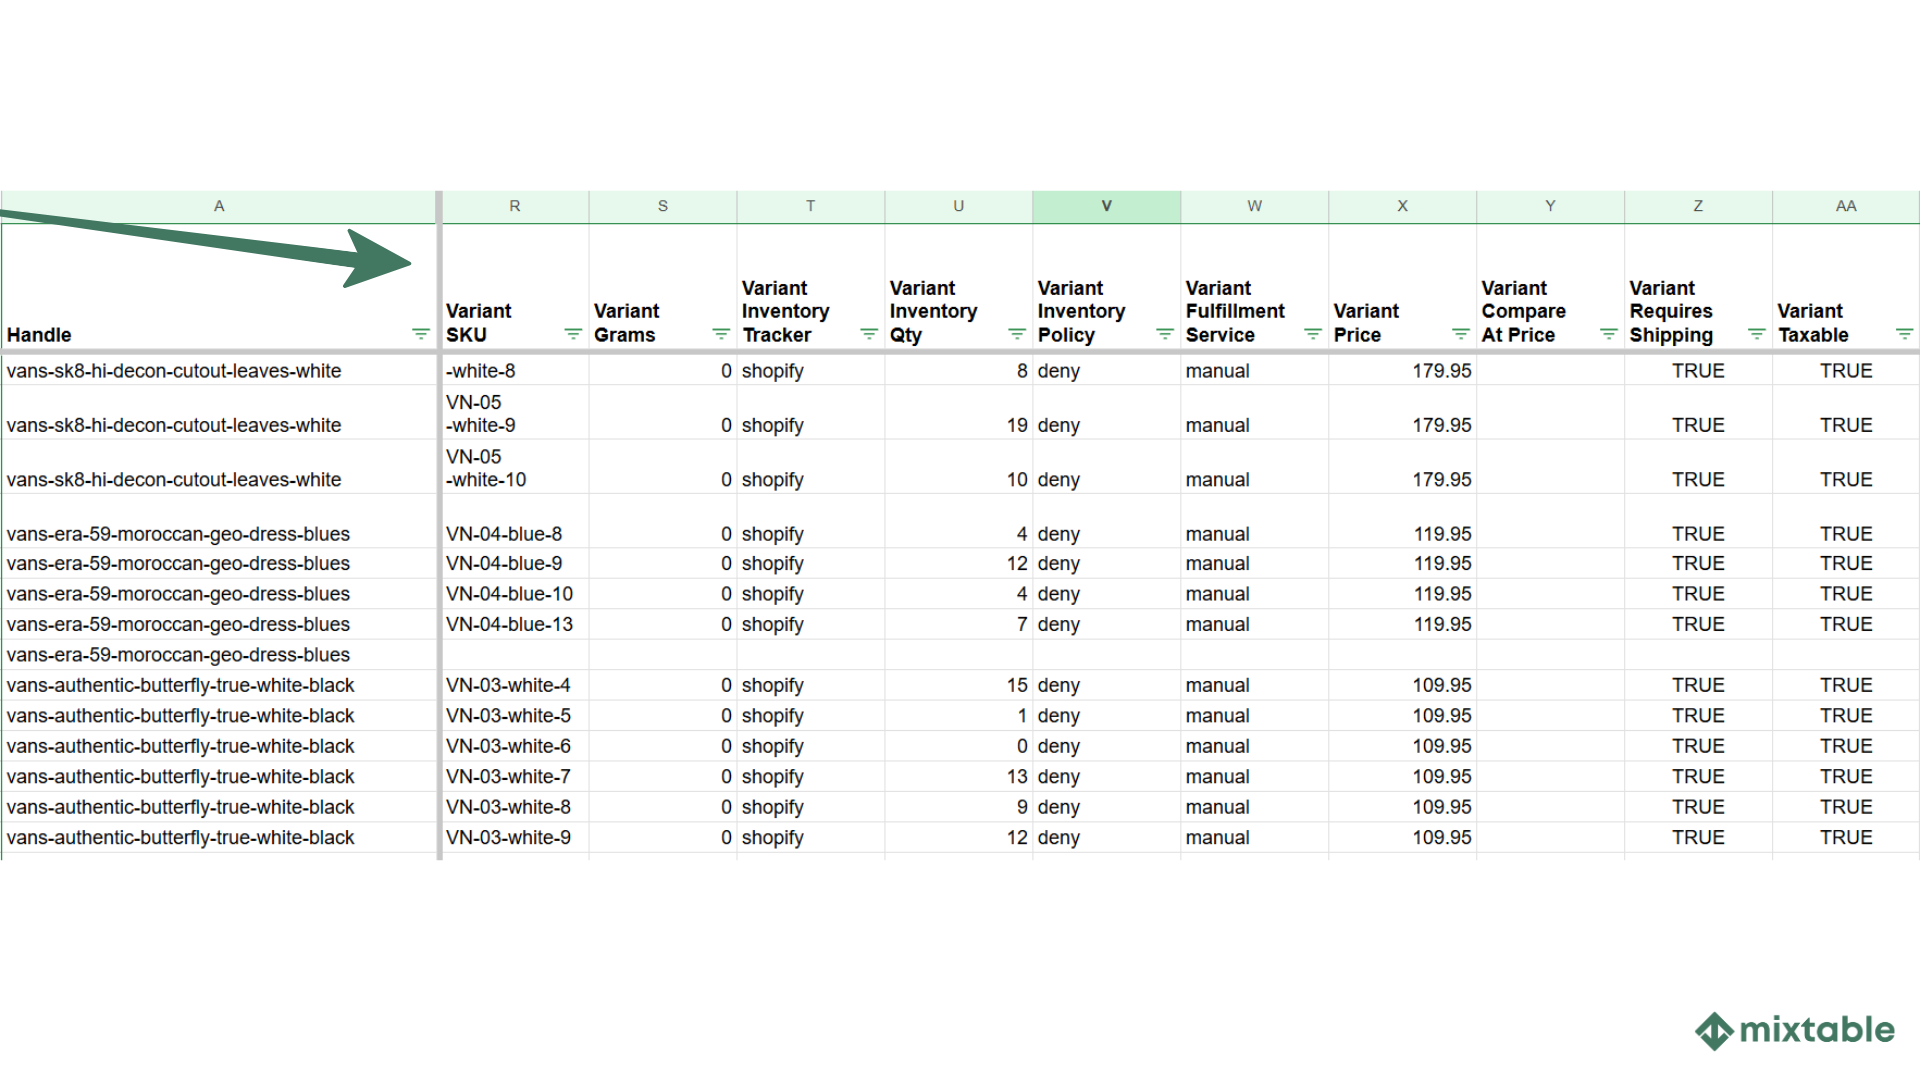
Another option to add and edit Product Variants in Shopify is through .CSV export and import.
- Go to Admin > Products
- Click Export. If you have more than 50 products, the export will be sent to your email.
- You can add rows with new variants by adding all necessary data in fields or edit existing variants.
- Import back the .CSV file.

Option 3: Use a Spreadsheet App
Adding variants to the products in your Shopify store is simple if you choose to do it with the Mixtable Spreadsheet Editor. With the app, you can:
- Add variants to products individually or in bulk.
- Add variants to existing products.
- Create products in the spreadsheet and add variants to them afterward.
Follow the steps below to add variants to products in bulk:
Step 1: Add Shopify Products to a Spreadsheet
Once you install the Mixtable app from Shopify app store, you will be able to populate your store data into the spreadsheet and manage it from there. Here’s how it’s done.
Below are the steps to add a Products (with variants) worksheet (if you don’t have one already).
- In your Mixtable app, click on the + button in the worksheet toolbar.
- In the window that opens, select the Products (with variants) option. You’ll see the new worksheet show up in your workbook, and it will automatically start to populate with your existing Shopify products, along with their variants.
Note: Each row in this worksheet represents a variant, for products that have them, or a product for products that don’t use variants.
You can modify either product or variant fields by editing this worksheet.
Step 2: Manage your Variant and Product Data
Now that your Products (with variants) worksheet is set up, it’s time to manage your data.
The worksheet works exactly like the Shopify CSV import template - each row can be used to add/update a variant, or the product associated with it.
The worksheet has columns showing the fields most requested by our users. You are welcome to remove columns you don’t need or use blank columns to add data fields that you do need.
To add, remove or change data to this worksheet, do exactly what you would do in Excel (e.g., if you were editing the Shopify CSV import) - either type in the data manually, or copy & paste it.
Let’s run through a few common use cases:
Use case 1: Add variants to an existing product
Mixtable allows you to manage your store data from the comfort of a spreadsheet interface, with all the functions you are used to like copy-paste, find & replace, Excel formulas, and more. This helps you bulk edit your data and be as efficient as possible at no cost of learning how to use a new tool.
Here we want to add a variant to an existing product in Shopify with the Mixtable Spreadsheet Editor app:
- Go to the first empty row at the bottom of the worksheet
- Set the Product Handle cell to the handle of the product that we want to add a variant to. You can either type in this value (or paste it), or you can click on the 🔍 icon that Mixtable automatically adds to cells in this column. Clicking on the 🔍 icon will bring up the Select Product dialog, showing you a list of your existing products. Select the product you want to add the variant to, and Mixtable will automatically populate the handle into the cell for you.
- Add your variant data. At the very least you need to enter Option values for all the Options that the product has (e.g., size, color). This is sufficient to create the variant in Shopify. You can, of course, also add other information - such as price, cost, or inventory at a location.
- When you are done entering your data, click on the Sync sheet to Shopify button and Mixtable will create the new variants for you.
Use case 2: Create a product with multiple variants
Here we want to add a product to Shopify, and the product has multiple variants. So we want to create the product and the variants at the same time.
- Go to the first empty row at the bottom of the worksheet
- Now, in this example, we are going to populate three rows with data, because we want to create three variants. We are going to add both product and variant information to our rows, so that Mixtable can create the product and variants at the same time.
- In the first row set the Product Title and Product Handle values to the name of your product, and the URL handle that you want to use for it, respectively. You only need to specify the Product Title on the row for the first variant for the product, the other variants will get that value populated in their cells after you sync and create the product in Shopify.
- Set the Product Handle of the other two rows to the same value as the one on the first row. This signals to Mixtable that all three variants belong to the same product.
- Add your variant data for all three variants. At the very least you need to enter Option values for all the Options that the product has (e.g., size, color). This is sufficient to create the variant in Shopify. You can, of course, also add other information - such as price, cost, or inventory at a location.
- In our example we’ll be creating two options for the product - size and color - and so will have to specify the variant option values for both options.
- When you are done entering your data, click on the Sync sheet to Shopify button and Mixtable will create the product with its variants for you.
Use case 3: Create a product with no variants
The steps to create a product with no variants is the exact same as when adding a product with variants, with one difference - omit the Option data.
- Go to the first empty row at the bottom of the worksheet
- Set the Product Handle and Product Title for the product we are adding. This is all the information you need to create a barebones product, but you are welcome to add any other data you need - description, price, cost, inventory, etc.
- When you are done entering your data, click on the Sync sheet to Shopify button and Mixtable will create the new product for you.
- If you have Option Name and Option Value columns you’ll see that after the product is created these columns will populate with Title and Default Title respectively. In Shopify a product always has at least one variant as it is on the variant that Shopify stores pricing and inventory information. So if you don’t provide variant information (the Options data), Shopify auto-creates a variant for you with an Option Name of Title and an Option Value of Default Title.
Use case 4: Add a new Option to an existing product and its variants
Here we have an existing product, and some variants, and we want to add a new Option into the mix. In our example the product already has an Option 1, and we’ll be adding an Option 2.
- Find the first row that contains a variant for our product. In this row find the column displaying the Option 2 Name. Set the cell value in this row for this column to the new option we are adding. In our example video we’ll be adding the “Loaf size” option to our product and its variants.
- Now find the column displaying the Option 2 Value. Set the cell value in this column for every variant row to the option value that each variant should have (e.g., small)
- When you are done entering your data, click on the Sync sheet to Shopify button and Mixtable will add the new option to your product and its variants.
You're ready!
Mixtable is an online spreadsheet designed to sync data with Shopify. It looks, feels, and behaves like Excel (including formulas), but runs in your browser. With Mixtable you can:
Best of all, you can sync changes back to Shopify with a single click. Find out more about the Mixtable suite of products here.

